did-you-know? rent-now

Amazon no longer offers textbook rentals. We do!

did-you-know? rent-now

Amazon no longer offers textbook rentals. We do!

We're the #1 textbook rental company. Let us show you why.

9780312615772

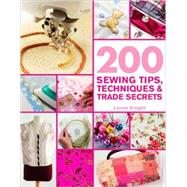
200 Sewing Tips, Techniques & Trade Secrets An Indispensable Compendium of Technical Know-How and Troubleshooting Tips

by
  • ISBN13:

    9780312615772

  • ISBN10:

    0312615779

  • Format: Paperback
  • Copyright: 2010-05-11
  • Publisher: St. Martin's Griffin
  • Purchase Benefits
List Price: $22.99

Summary

-Just like having your own personal sewing guru on hand 24 hours a day, this book covers all the techniques you could ever need, along with handy hints, timesaving tips, and homespun secrets. -Improve you skills, speed up your sewing time, and make garments, accessories, and home projects with a professional finish in no time! -Easy-to-follow techniques are organized in the order you'll need them, or you can dip in and out for help with a specific problem. -"Try it" and "Fix it" panels highlight useful inspirations and troublshooting ideas throughout the book.

Author Biography

LORNA KNIGHT specialized in textiles at Queen Margaret College in Edinburgh. She spent ten years teaching design and technology in middle schools in the UK before setting up a business designing and making lingerie and running workshops teaching a wide range of sewing skills from both the couture and high street fashion worlds. Lorna also writes regularly for Sewing World magazine and has contributed to many sewing books and other fashion publications. Her previous books include The Sewing Stitch Bible and The Dressmaker's Technique Bible.

Table of Contents

200 SEWING TIPS, TECHNIQUES & TRADE
Tools and equipment
As with any craft, it is so much easier to complete a task if the right tools are on hand. Whether you are cutting fabric, paper patterns, or threads, there are appropriate scissors for each case. The same applies to needles, pins, and those more obscure gadgets that speed up the process and improve the finish. Use this chapter to select the necessary tools to help with your sewing projects.
Essential equipment
As with any craft, specialist tools help in achieving a good result. While a needle is the minimum requirement, there are numerous useful tools, gadgets, and materials that can make a sewer's life easier.
 
1
8 Work surface
A flat surface at a workable height, such as a table or worktop, is a fundamental part of a sewing room. Although you can cover the floor with a sheet before laying fabric over it for cutting out, most work needs a handy surface to prevent your knees and back from aching.
2
There are some tools that may seem like luxury items, but after you've used them you will not be able to understand how you managed to sew without them.
3 Serger
These useful machines are for neatening raw edges and giving clothes a professional finish. However, they also perform many other decorative functions and, although not essential, are a great asset.
Needle know-how
The needle is the principal piece of sewing equipment-- you must have one if you want to sew! Originally whittled from bone or wood, needles are now made from high quality steel in sizes for every application.
3
Anatomy of a needle
4
Can't thread your needle?
• Cut the thread at an angle. This makes it easier to fit through the eye.
• Place a piece of white paper behind the eye of the needle to make it easier to see the hole for the thread to go through.
• Use a needle threading wire or gadget. There are many of these on the market (see below), ranging from a simple diamond-shaped wire on a handle, to tiny hooks that pull a thread length through the eye.
FIX IT
5 Is your needle skipping stitches?
• It is important to choose the correct machine needle for each task. It saves time and produces better stitches.
• Embroidery and metallic needles prevent the threads from breaking or shredding, which means that you don't have to keep rethreading the needle.
• If you need to change the type of needle while there is still some life in it, don't discard it. Make a needle cushion with segments for different sizes and types of needle. Write the information on the cushion with a fine permanent pen or embroider it by machine or hand.
• Use a magnifying glass to read the size on the body of the needle.
• Replace needles frequently; don't wait until they bend or break. As the needles dull, they will cause skipped stitches and may even damage the fabric.
MAKE IT!
6
Simple storage bags
You will need:
• A mix of plain and patterned cotton fabric in the same weight
• Ribbon
• Thread for making up (a contrast color looks attractive)
7
Threading your needle
One of the hardest tricks to learn when beginning to sew is how to thread small-eyed needles.
8
Choosing needles
It is important to select the correct needle for the task in hand whether for hand sewing or machine sewing. Neat hand sewing is easier to produce with the correct size and type of needle and, although machine needles may all look the same, their subtle differences tailor them for particular threads or fabrics.
Pin pointers
Pins are vital for preparing fabric to sew. Use them to secure a paper pattern to material for cutting out, to hold two pieces of fabric together in a mock seam to check the fit, or to hold pleats or hems in place before stitching. Whatever you use pins for, make sure they are sharp and rust-free.
 
9
Working with net or tulle
Use safety pins rather than standard straight pins when working with net or tulle. To divide a large section of net for gathering into a Full underskirt, use safety pins to identify the sections as standard pins will fall out.
10
Perfect pins
11
A weighty alternative
When pins cannot be used--the fabric may be too thick to penetrate or pinholes will permanently damage the material-- weights are a good alternative. These might simply be kitchen weights or, for large soft furnishing projects, a brick in a wool sock. Use the weights to prevent a paper pattern from moving when you cut out the fabric, as shown right.
MAKE IT!
12
Transform a brick into a fabric weight
A large weight is useful for drapes and large soft furnishing projects. Add padding to the brick as shown to protect the fabric you are sewing. The handle makes it easy to move around.
13
Top tips for pinning
• Discard all bent and rusty pins.
• Keep a box or container for old pins and needles. When it is full it can be thrown away safely.
• Some pins have large plastic heads. Do not iron over these, as they melt!
• Use small-headed craft pins when pattern making. Large-headed pins can distort measurements that are critical to achieving a perfect fit.
• Do not sew over pins. Even if pins are placed across the seam it is not safe to stitch over them, as pins and needles may break and shatter, throwing up tiny pieces of metal. Simply remove the pins as you reach them.
• Attach paper patterns to fabric with pins placed within the pattern boundary. In this way you will avoid cutting them with scissors. It might not be a problem to the pins but it may well damage the scissor blades. Also, when pinning delicate fabric, the body of the fabric can't be damaged when pinning within seams.
14
Perfect your pinning technique
Everyone has their own preferences when pinning, but you wilt need to choose different methods for different tasks.
15
Pinning for beginners
If you have been sewing for years, pinning comes naturally. Beginners may find it more difficult. Simply put the pin through the fabric, then fold the fabric close to the point and bring the pin back to the surface.
Great gadgets
Specialist gadgets and tools are available to make sewing tasks easier. Some of these are well known and easy to get hold of; others are more obscure, but make a real difference when tackling sewing problems. When you find something new, share it with your sewing friends.
 
16
TRY IT
17 Decorate plain fabric with a daisy foot
18
Bobby pin tube turner
If you do not have a dedicated tool to turn through a narrow tube, try this neat trick with a bobby pin. With a bit of practice, it is easy to make fine straps or button loops.
 
19
Cardboard tube seam roll
Use a cardboard tube for pressing narrow sleeves and legs of pants. You will need: a long cardboard tube; an old clean wool blanket or a length of 100% wool fabric and cotton sheeting.
20
Handy improvised tools
In addition to specialist tools, there are lots of everyday items you can use to help you when sewing.
Dishcloth
A 100% cotton or linen dishcloth is a good alternative to a pressing cloth. Simply place it over a seam or hem to protect the fabric from the iron.
 
Panty hose
When sewing with springy, decorative threads on a serger, the thread may sometimes get caught beneath the reel. To prevent this from happening, cut up a pair of panty hose into lengths of about 6 in (15 cm) and slide a piece over the reel of thread. This holds the thread just close enough to stop it falling off and becoming stuck.
Pressing points
An iron is an essential sewing aid. It helps to produce a smooth, crease-free finished garment, and controls fabric edges and folds to make sewing tasks easier.
 
21
Which iron should I use?
The most common types of iron are listed below. Make sure you are using the best iron for the sewing task in hand.
22
Board of ironing?
There are three key points to consider when choosing an ironing board:
 
Buy a height-adjustable ironing board. Correct height is essential for comfort, and there will be occasions when you might prefer to sit rather than stand.
 
Ironing boards vary in length and some are wider than others. If storage space is not an issue, a longer and wider one is more useful, as it gives a larger surface, not just to iron on but to cut out on, too.
 
Cover your board with more padding and new fabric if it only has a thin layer over the mesh. The extra depth helps draw steam through the board and the padding reduces the chance of lines and ridges of seams or hems showing on the right side.
23
Everyday pressing aids
Specialist products like a sleeve board, a seam roll, or a point press are helpful for a smooth finish. However, everyday materials are also useful. Thin cardboard can be slipped under a seam allowance or hem when ironing to prevent a ridge from forming on the right side. You can use any fine, smoothly woven natural fabric as a pressing cloth to protect a garment, but 100% silk organza is by far the most effective. It is translucent so the fabric below can be seen easily, and it will not melt under the heat of the iron.
Sewing machine tips
The sewing machine is your most important tool. It might not be the latest model, but it must be as reliable as a best friend, and should be treated as one. Never take it for granted, or it might let you down when you need it most!
 
24
Warning: Make sure the machine is set to straight stitch, as the needle will break if it swings and hits the foot!
Warning: Test the width of the stitch first to make sure the stitches are formed over the "finger." if the needle hits the foot it will break!
 
25
Carry case
If you attend workshops and courses and have to take your sewing machine, invest in a proper carry case. This makes it easier to transport and provides better protection for the sewing machine. If you transport your machine in the trunk of your car, place it on a large piece of foam rubber to help soften the jolts.
 
26
Machine maintenance
• Service as required. This will depend on how frequently the machine is used. Follow the guidelines given in the manual or by the dealer.
• Keep the machine dust and lint free. Use a small brush or cotton swab. Pressurized cans of air are a popular way to remove lint from a machine, but they may only be blowing the lint further into the mechanism, which will cause trouble at a later date.
• Many modern machines may not require lubrication. If this is the case, leave it to the mechanic when it is serviced.
• Cover your sewing machine when not in use. Dust seems to appear from nowhere and the machine's plastic casing may discolor in sunlight.
27
How to make a machine cover
Make a cover to protect your machine when it is not in use.
1 Measure the length, height, and depth of the machine and add seam allowances to all sides.
 
2 Cut out one top, a front and back, and two sides. Decorate the front panel with a selection of the stitches from your machine before sewing the pieces together. Fold up a double hem at the bottom of the cover and topstitch in place. It is good to see the stitches rather than look at diagrams of them in the sewing machine manual.
 
28
Buying a machine
Research
If you have decided to invest in a new sewing machine, do as much research as possible before you commit yourself to a particular make or model. Ask friends about their machines, attend sewing exhibitions, and visit sewing machine retailers to ask their advice.
 
Types of sewing
What sewing do you enjoy, and are you looking to do something different in future? Whether you quilt, make clothes or drapes, or do machine embroidery, it will affect your choice of machine. Select a machine that will suit your needs and consider how you would like your sewing to develop. Do not restrict yourself or you will quickly grow out of your new machine.
 
Stitches
There will be certain stitches you know you will need. For example, you may require a good variety of buttonholes or a nice range of decorative stitches. Make sure the machine you choose includes what you require.
 
Try it out
When searching for a new machine, take some fabric with you. Try out different machines with the type of fabric you tend to use and see how it copes. Some models work better with delicate lingerie fabrics, while others are more suited to thick layers of quilting.
 
Local retailer
Carefully consider where you buy your machine. There may be a fantastic deal on the Internet but sales advice may not be easy to access. Your local dealer, however, will be there to help in the months and years to come, and will offer a far better service if you bought the machine from him at the outset.
Modern machines
You can sew well if you have a sewing machine, basic equipment, and some useful gadgets, but there are some additional machines that make life even easier--or just more fun.
 
29
Clever cutting
Blades of all shapes and sizes are available and each has a task to perform in the sewing room. Get the best results by using the right tool for each job.
30
Scissors stash
TRY IT
31 What's the best way to cut fur fabric?
Cut fur fabric from the wrong side with small needlework scissors. Cut the backing only and then tease the fur apart. This reduces the need for a vacuum cleaner!
32
Alternative cutting tools
As well as using scissors to cut fabrics and threads, there are other cutting gadgets in the sewing room. They are useful additions to your sewing box and will save both time and energy.
Rotary cutter
This has a circular blade with a handle and is used with a self-healing mat placed under the fabric. It cuts fabric accurately and several layers can be cut at once. This makes it ideal for patchwork and small garment pieces. It is a fast method of cutting out. Here are a few useful tips:
• Buy two blades so there is always a spare if the other gets damaged.
• Buy the largest mat you have space for, especially if you are using it for clothes as well as patchwork.
• Keep the mat flat and away from heat, as it can bend and crack.
Buttonhole chisel
Opening buttonholes neatly without snipping the threads can be difficult--but not with a buttonhole chisel. Place over the center of the buttonhole and tap the end to cut through the fabric.
33
Looking after your cutters
• If you attend a class or sewing group with friends, tie a length of ribbon to the handle of your fabric shears to make yours stand out.
• Blades become dull through use. Sharpen them when they need it.
• Dropping scissors on the floor can knock them out of alignment. Place them in the center of the table when not in use, not close to the edge.
• Keep scissors dry and out of damp conditions where they may rust.
Troubleshooting for machines
Sometimes you may be disappointed with your sewing or the machine may not work as it should. Such problems can usually be prevented--or easily solved--when you know how.
 
34
Fabric problems
35
Thread problems
If the top thread keeps breaking, it is probably not running smoothly through the thread guides.
• Check that it is unwinding evenly from the spool--it may be twisted around the spindle. This can happen if the spool moves up and down the spindle as you stitch. Add a spool (reel) cap (supplied with the machine) to keep the spool in place.
• Check that the spool is set the right way on the spindle. The thread should usually come over from the back to the front, but your sewing machine manual will show the correct direction for your type of machine.
• Do not use old thread, which can be weakened by age and break easily.
• Avoid using cheap thread, which can be uneven and prone to snap.
• A slight nick (invisible to the naked eye) in the eye of the needle can cause breaking thread. Nicks can result from the use of rough thread, such as metallic thread. Use a specially designed or large-eyed needle with such threads and insert a new needle for all other threads.
36
Machine jams
Removing lint: You should remove lint from the sewing machine after every project, and more frequently when sewing with fluffy fabrics, such as wools, fleece, and knits. Take out the bobbin, blow out the lint, and use the brush supplied in the accessories case.
 
Oiling: Modern machines are self-lubricating, but older models may need oiling. Check your sewing machine manual and follow the guidelines. Always sew scrap fabric after oiling to prevent surplus oil from damaging a project.
 
Buttonhole jam: Always reinforce the area to be stitched with interfacing to provide a good base for the concentrated stitching. Avoid stitching too close to the edge of the fabric--if the presser foot has insufficient fabric to grip, the fabric can be drawn down into the throat plate.
 
Foot pedal doesn't work: Check that the pedal is pushed firmly into the machine--it can work loose if the machine is moved. If the problem persists, ask your machine dealer to check the wiring.
 
No power: Check the plug and fuse. Make sure the wire is pushed firmly into the machine. Check that the bobbin-winding spindle is not engaged, preventing normal sewing. If the problem persists, contact your machine dealer and have the wiring checked.
37
Stitch problems
Copyright © 2010 by Quarto Inc.

Supplemental Materials

What is included with this book?

The New copy of this book will include any supplemental materials advertised. Please check the title of the book to determine if it should include any access cards, study guides, lab manuals, CDs, etc.

The Used, Rental and eBook copies of this book are not guaranteed to include any supplemental materials. Typically, only the book itself is included. This is true even if the title states it includes any access cards, study guides, lab manuals, CDs, etc.

Excerpts

200 SEWING TIPS, TECHNIQUES & TRADE
Tools and equipment
As with any craft, it is so much easier to complete a task if the right tools are on hand. Whether you are cutting fabric, paper patterns, or threads, there are appropriate scissors for each case. The same applies to needles, pins, and those more obscure gadgets that speed up the process and improve the finish. Use this chapter to select the necessary tools to help with your sewing projects.
Essential equipment
As with any craft, specialist tools help in achieving a good result. While a needle is the minimum requirement, there are numerous useful tools, gadgets, and materials that can make a sewer's life easier.
 
1
8 Work surface
A flat surface at a workable height, such as a table or worktop, is a fundamental part of a sewing room. Although you can cover the floor with a sheet before laying fabric over it for cutting out, most work needs a handy surface to prevent your knees and back from aching.
2
There are some tools that may seem like luxury items, but after you've used them you will not be able to understand how you managed to sew without them.
3 Serger
These useful machines are for neatening raw edges and giving clothes a professional finish. However, they also perform many other decorative functions and, although not essential, are a great asset.
Needle know-how
The needle is the principal piece of sewing equipment-- you must have one if you want to sew! Originally whittled from bone or wood, needles are now made from high quality steel in sizes for every application.
3
Anatomy of a needle
4
Can't thread your needle?
• Cut the thread at an angle. This makes it easier to fit through the eye.
• Place a piece of white paper behind the eye of the needle to make it easier to see the hole for the thread to go through.
• Use a needle threading wire or gadget. There are many of these on the market (see below), ranging from a simple diamond-shaped wire on a handle, to tiny hooks that pull a thread length through the eye.
FIX IT
5Is your needle skipping stitches?
• It is important to choose the correct machine needle for each task. It saves time and produces better stitches.
• Embroidery and metallic needles prevent the threads from breaking or shredding, which means that you don't have to keep rethreading the needle.
• If you need to change the type of needle while there is still some life in it, don't discard it. Make a needle cushion with segments for different sizes and types of needle. Write the information on the cushion with a fine permanent pen or embroider it by machine or hand.
• Use a magnifying glass to read the size on the body of the needle.
• Replace needles frequently; don't wait until they bend or break. As the needles dull, they will cause skipped stitches and may even damage the fabric.
MAKE IT!
6
Simple storage bags
You will need:
• A mix of plain and patterned cotton fabric in the same weight
• Ribbon
• Thread for making up (a contrast color looks attractive)
7
Threading your needle
One of the hardest tricks to learn when beginning to sew is how to thread small-eyed needles.
8
Choosing needles
It is important to select the correct needle for the task in hand whether for hand sewing or machine sewing. Neat hand sewing is easier to produce with the correct size and type of needle and, although machine needles may all look the same, their subtle differences tailor them for particular threads or fabrics.
Pin pointers
Pins are vital for preparing fabric to sew. Use them to secure a paper pattern to material for cutting out, to hold two pieces of fabric together in a mock seam to check the fit, or to hold pleats or hems in place before stitching. Whatever you use pins for, make sure they are sharp and rust-free.
 
9
Working with net or tulle
Use safety pins rather than standard straight pins when working with net or tulle. To divide a large section of net for gathering into a Full underskirt, use safety pins to identify the sections as standard pins will fall out.
10
Perfect pins
11
A weighty alternative
When pins cannot be used--the fabric may be too thick to penetrate or pinholes will permanently damage the material-- weights are a good alternative. These might simply be kitchen weights or, for large soft furnishing projects, a brick in a wool sock. Use the weights to prevent a paper pattern from moving when you cut out the fabric, as shown right.
MAKE IT!
12
Transform a brick into a fabric weight
A large weight is useful for drapes and large soft furnishing projects. Add padding to the brick as shown to protect the fabric you are sewing. The handle makes it easy to move around.
13
Top tips for pinning
• Discard all bent and rusty pins.
• Keep a box or container for old pins and needles. When it is full it can be thrown away safely.
• Some pins have large plastic heads. Do not iron over these, as they melt!
• Use small-headed craft pins when pattern making. Large-headed pins can distort measurements that are critical to achieving a perfect fit.
• Do not sew over pins. Even if pins are placed across the seam it is not safe to stitch over them, as pins and needles may break and shatter, throwing up tiny pieces of metal. Simply remove the pins as you reach them.
• Attach paper patterns to fabric with pins placed within the pattern boundary. In this way you will avoid cutting them with scissors. It might not be a problem to the pins but it may well damage the scissor blades. Also, when pinning delicate fabric, the body of the fabric can't be damaged when pinning within seams.
14
Perfect your pinning technique
Everyone has their own preferences when pinning, but you wilt need to choose different methods for different tasks.
15
Pinning for beginners
If you have been sewing for years, pinning comes naturally. Beginners may find it more difficult. Simply put the pin through the fabric, then fold the fabric close to the point and bring the pin back to the surface.
Great gadgets
Specialist gadgets and tools are available to make sewing tasks easier. Some of these are well known and easy to get hold of; others are more obscure, but make a real difference when tackling sewing problems. When you find something new, share it with your sewing friends.
 
16
TRY IT
17Decorate plain fabric with a daisy foot
18
Bobby pin tube turner
If you do not have a dedicated tool to turn through a narrow tube, try this neat trick with a bobby pin. With a bit of practice, it is easy to make fine straps or button loops.
 
19
Cardboard tube seam roll
Use a cardboard tube for pressing narrow sleeves and legs of pants. You will need: a long cardboard tube; an old clean wool blanket or a length of 100% wool fabric and cotton sheeting.
20
Handy improvised tools
In addition to specialist tools, there are lots of everyday items you can use to help you when sewing.
Dishcloth
A 100% cotton or linen dishcloth is a good alternative to a pressing cloth. Simply place it over a seam or hem to protect the fabric from the iron.
 
Panty hose
When sewing with springy, decorative threads on a serger, the thread may sometimes get caught beneath the reel. To prevent this from happening, cut up a pair of panty hose into lengths of about 6 in (15 cm) and slide a piece over the reel of thread. This holds the thread just close enough to stop it falling off and becoming stuck.
Pressing points
An iron is an essential sewing aid. It helps to produce a smooth, crease-free finished garment, and controls fabric edges and folds to make sewing tasks easier.
 
21
Which iron should I use?
The most common types of iron are listed below. Make sure you are using the best iron for the sewing task in hand.
22
Board of ironing?
There are three key points to consider when choosing an ironing board:
 
Buy a height-adjustable ironing board. Correct height is essential for comfort, and there will be occasions when you might prefer to sit rather than stand.
 
Ironing boards vary in length and some are wider than others. If storage space is not an issue, a longer and wider one is more useful, as it gives a larger surface, not just to iron on but to cut out on, too.
 
Cover your board with more padding and new fabric if it only has a thin layer over the mesh. The extra depth helps draw steam through the board and the padding reduces the chance of lines and ridges of seams or hems showing on the right side.
23
Everyday pressing aids
Specialist products like a sleeve board, a seam roll, or a point press are helpful for a smooth finish. However, everyday materials are also useful. Thin cardboard can be slipped under a seam allowance or hem when ironing to prevent a ridge from forming on the right side. You can use any fine, smoothly woven natural fabric as a pressing cloth to protect a garment, but 100% silk organza is by far the most effective. It is translucent so the fabric below can be seen easily, and it will not melt under the heat of the iron.
Sewing machine tips
The sewing machine is your most important tool. It might not be the latest model, but it must be as reliable as a best friend, and should be treated as one. Never take it for granted, or it might let you down when you need it most!
 
24
Warning:Make sure the machine is set to straight stitch, as the needle will break if it swings and hits the foot!
Warning:Test the width of the stitch first to make sure the stitches are formed over the "finger." if the needle hits the foot it will break!
 
25
Carry case
If you attend workshops and courses and have to take your sewing machine, invest in a proper carry case. This makes it easier to transport and provides better protection for the sewing machine. If you transport your machine in the trunk of your car, place it on a large piece of foam rubber to help soften the jolts.
 
26
Machine maintenance
• Service as required. This will depend on how frequently the machine is used. Follow the guidelines given in the manual or by the dealer.
• Keep the machine dust and lint free. Use a small brush or cotton swab. Pressurized cans of air are a popular way to remove lint from a machine, but they may only be blowing the lint further into the mechanism, which will cause trouble at a later date.
• Many modern machines may not require lubrication. If this is the case, leave it to the mechanic when it is serviced.
• Cover your sewing machine when not in use. Dust seems to appear from nowhere and the machine's plastic casing may discolor in sunlight.
27
How to make a machine cover
Make a cover to protect your machine when it is not in use.
1Measure the length, height, and depth of the machine and add seam allowances to all sides.
 
2Cut out one top, a front and back, and two sides. Decorate the front panel with a selection of the stitches from your machine before sewing the pieces together. Fold up a double hem at the bottom of the cover and topstitch in place. It is good to see the stitches rather than look at diagrams of them in the sewing machine manual.
 
28
Buying a machine
Research
If you have decided to invest in a new sewing machine, do as much research as possible before you commit yourself to a particular make or model. Ask friends about their machines, attend sewing exhibitions, and visit sewing machine retailers to ask their advice.
 
Types of sewing
What sewing do you enjoy, and are you looking to do something different in future? Whether you quilt, make clothes or drapes, or do machine embroidery, it will affect your choice of machine. Select a machine that will suit your needs and consider how you would like your sewing to develop. Do not restrict yourself or you will quickly grow out of your new machine.
 
Stitches
There will be certain stitches you know you will need. For example, you may require a good variety of buttonholes or a nice range of decorative stitches. Make sure the machine you choose includes what you require.
 
Try it out
When searching for a new machine, take some fabric with you. Try out different machines with the type of fabric you tend to use and see how it copes. Some models work better with delicate lingerie fabrics, while others are more suited to thick layers of quilting.
 
Local retailer
Carefully consider where you buy your machine. There may be a fantastic deal on the Internet but sales advice may not be easy to access. Your local dealer, however, will be there to help in the months and years to come, and will offer a far better service if you bought the machine from him at the outset.
Modern machines
You can sew well if you have a sewing machine, basic equipment, and some useful gadgets, but there are some additional machines that make life even easier--or just more fun.
 
29
Clever cutting
Blades of all shapes and sizes are available and each has a task to perform in the sewing room. Get the best results by using the right tool for each job.
30
Scissors stash
TRY IT
31What's the best way to cut fur fabric?
Cut fur fabric from the wrong side with small needlework scissors. Cut the backing only and then tease the fur apart. This reduces the need for a vacuum cleaner!
32
Alternative cutting tools
As well as using scissors to cut fabrics and threads, there are other cutting gadgets in the sewing room. They are useful additions to your sewing box and will save both time and energy.
Rotary cutter
This has a circular blade with a handle and is used with a self-healing mat placed under the fabric. It cuts fabric accurately and several layers can be cut at once. This makes it ideal for patchwork and small garment pieces. It is a fast method of cutting out. Here are a few useful tips:
• Buy two blades so there is always a spare if the other gets damaged.
• Buy the largest mat you have space for, especially if you are using it for clothes as well as patchwork.
• Keep the mat flat and away from heat, as it can bend and crack.
Buttonhole chisel
Opening buttonholes neatly without snipping the threads can be difficult--but not with a buttonhole chisel. Place over the center of the buttonhole and tap the end to cut through the fabric.
33
Looking after your cutters
• If you attend a class or sewing group with friends, tie a length of ribbon to the handle of your fabric shears to make yours stand out.
• Blades become dull through use. Sharpen them when they need it.
• Dropping scissors on the floor can knock them out of alignment. Place them in the center of the table when not in use, not close to the edge.
• Keep scissors dry and out of damp conditions where they may rust.
Troubleshooting for machines
Sometimes you may be disappointed with your sewing or the machine may not work as it should. Such problems can usually be prevented--or easily solved--when you know how.
 
34
Fabric problems
35
Thread problems
If the top thread keeps breaking, it is probably not running smoothly through the thread guides.
• Check that it is unwinding evenly from the spool--it may be twisted around the spindle. This can happen if the spool moves up and down the spindle as you stitch. Add a spool (reel) cap (supplied with the machine) to keep the spool in place.
• Check that the spool is set the right way on the spindle. The thread should usually come over from the back to the front, but your sewing machine manual will show the correct direction for your type of machine.
• Do not use old thread, which can be weakened by age and break easily.
• Avoid using cheap thread, which can be uneven and prone to snap.
• A slight nick (invisible to the naked eye) in the eye of the needle can cause breaking thread. Nicks can result from the use of rough thread, such as metallic thread. Use a specially designed or large-eyed needle with such threads and insert a new needle for all other threads.
36
Machine jams
Removing lint:You should remove lint from the sewing machine after every project, and more frequently when sewing with fluffy fabrics, such as wools, fleece, and knits. Take out the bobbin, blow out the lint, and use the brush supplied in the accessories case.
 
Oiling:Modern machines are self-lubricating, but older models may need oiling. Check your sewing machine manual and follow the guidelines. Always sew scrap fabric after oiling to prevent surplus oil from damaging a project.
 
Buttonhole jam:Always reinforce the area to be stitched with interfacing to provide a good base for the concentrated stitching. Avoid stitching too close to the edge of the fabric--if the presser foot has insufficient fabric to grip, the fabric can be drawn down into the throat plate.
 
Foot pedal doesn't work:Check that the pedal is pushed firmly into the machine--it can work loose if the machine is moved. If the problem persists, ask your machine dealer to check the wiring.
 
No power:Check the plug and fuse. Make sure the wire is pushed firmly into the machine. Check that the bobbin-winding spindle is not engaged, preventing normal sewing. If the problem persists, contact your machine dealer and have the wiring checked.
37
Stitch problems
Copyright © 2010 by Quarto Inc.

Rewards Program