did-you-know? rent-now

Amazon no longer offers textbook rentals. We do!

did-you-know? rent-now

Amazon no longer offers textbook rentals. We do!

We're the #1 textbook rental company. Let us show you why.

9780312366254

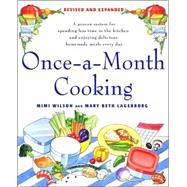
Once-A-Month Cooking A Proven System for Spending Less Time in the Kitchen and Enjoying Delicious, Homemade Meals Every Day

by ;
  • ISBN13:

    9780312366254

  • ISBN10:

    0312366256

  • Edition: Revised
  • Format: Paperback
  • Copyright: 2007-02-20
  • Publisher: St. Martin's Griffin
  • Purchase Benefits
List Price: $19.99 Save up to $6.50
  • Buy New
    $19.39

    USUALLY SHIPS IN 2-3 BUSINESS DAYS

Supplemental Materials

What is included with this book?

Summary

Since the first edition of Once-a-Month Cooking was published in 1986, its proven, practical method has helped thousands of families reduce their cooking time and still enjoy nightly home-cooked meals. You dont have to be a super savvy chef to pull your family together each week for these light and simple, easy-to-prepare meals. Revised to reflect todays healthier diet, this new edition explains how to: plan ahead, spend less time at the supermarket, cut down on prep time, group similar kitchen tasks together to get them all done at once, make kitchen clean-up more manageable, and use the freezer, computer, and your head to create a month full of delicious meals.

Author Biography

Mimi Wilson is author of Holy Habits: a Woman’s Guide to Intentional Living, and an internationally-known speaker who has lived in Congo, Ecuador, and Jordan. She and her husband Calvin, a physician, currently live in Denver, Colorado.
 
Mary Beth Lagerborg is Director of Media at MOPS International (Mothers of Preschoolers). She is a speaker, the author of Dwelling: Living Fully from the Space You Call Home, and editor with Karen J. Parks of Beyond Macaroni and Cheese. She and her husband Alex live in Littleton, Colorado.

Table of Contents

Chapter One
 
Getting Ready: An Overview of the Once-a-Month Plan
 
This cooking method enables you to prepare either a month's or two weeks' main dishes at once and freeze them. It includes two choices of one-month cycles and three choices of two-week cycles. If you rotate among these, you can easily provide great mealtime variety. We suggest that you start with a cycle from the book to get used to the method. Then you can experiment with adding family-favorite recipes. Turn to chapter 9 for help in adapting the method to your own recipes.
 
Each of the menu cycles gives you a menu calendar that shows the month's entrées at a glance, a grocery shopping list, a list of staples you should have on hand (add to the grocery list any you don't have), a list of the containers you will need for freezing the entrées, step-by-step instructions for preparing the recipes in sequence on your cooking day, and finally the recipes themselves, in the order you will prepare them.
 
To serve an entrée, you will need to thaw the dish and heat it. While it is being heated, you can prepare a vegetable, salad, or perhaps a dessert to serve with it. The time-consuming preparation and cleanup is done all at once on your megacooking day!
 
Since many of the entrées can be frozen in freezer bags instead of bulkier hard-sided containers, even a month's cycle can be stored in the freezer section of your refrigerator.
 
Just make sure you make room by cleaning it out before your cooking day. Sooner or later we need to deal with those hard knots of leftovers anyway! Right after cooking day you will probably not have room in the refrigerator's freezer for things like ice cream and loaves of bread, but as you use entrées from the freezer you can add these to it.
 
The recipes in Once-a-Month Cooking come not from stainless-steel test kitchens, but have been tested numerous times in homes by cooks of varying skills. We have selected recipes we think your family will eat and enjoy. They were chosen for taste, variety, nutritional value, easily available ingredients, and how well they lend themselves to freezing.
 
You will find that the recipes vary in serving size. The average is 5 or 6 servings. Some serve 4; a few serve 12. Depending on the ages (and eating habits) of your children, if you have four or fewer family members, you may want to divide and freeze each larger-serving entrée in two or more meal-size portions. The largest recipes are great for serving to company or ensuring leftovers the following day.
 
You may find that the one-month menu cycle actually feeds your family for five or six weeks or more—particularly if you occasionally eat out or supplement your menu with dinner salads or easy meals like grilled meats and vegetables.
 
Chapter 8 provides creative ways to serve fresh seasonal vegetables and other accompaniments with your entrées—as well as a few sweet treats to have on hand in your freezer. We think you will be as excited as we are about the wealth of ideas presented by our friend Rebecca Pasquariello, chef and owner of Savor Fresh Foods.
 
Consult chapter 10 for helpful information on such things as freezing tips and food-measurement equivalents.
 
Are you ready to cook? Or at least ready to think about getting ready to cook? Here are some tips to streamline the process.
 
First, read this introductory material. Then choose which menu cycle you would like to try this month and read through that chapter so you'll know what's ahead.
 
Next comes the hardest part: mark off the time on your calendar to grocery shop and cook! These should be on adjacent days. Don't try to shop and cook on the same day, especially if you have young children, or you won't like us very much! You simply won't have the time or energy to do both. You might also not like us about four hours into your cooking day, when your feet are complaining and every pot and pan you own is dirty. But we are consoled by the thought that you will like us very much when you peek at your larder, carefully labeled and layered in your freezer, as well as each day thereafter at about 5:00 p.m. The one-month cycles require about a nine-hour day (of course this varies with the cook). The two-week cycles take about five hours.
 
Cook with a friend or your spouse or an older child. The day goes so much more quickly when you divide the work and add conversation. If you have young children, a cooking companion can help tend the kids, answer the phone, and wipe the counters. You can either divide the food between your two families or cook one day a month at your friend's home and one day a month at your own.
 
Trust us that you will want to go out to dinner on cooking day! Yes, we know you will have plenty on hand for dinner. But you won't want to face any of it on your plate. This will pass. Go out, then have your spouse and kids wash the pots and pans.
 
Err on the side of buying a little more produce, chicken, and ground beef than is called for on your shopping lists. You can always use these for salads, soups, and sandwiches. If you have chicken broth left over, freeze it in an ice cube tray. When the cubes are frozen, pop them into a freezer bag. You can pull out a cube when a recipe calls for chicken broth, or make spur-of-the-moment chicken soup with leftovers.
 
You may want to photocopy the recipes and attach them to large index cards. In many cases you will be working on more than one recipe at a time. You can lay out your recipe cards in sequence to save you from having to keep turning the pages.
 
Don't even think about trying to do extra baking on your cooking day. If you enjoy making pie crust and want to use your own rather than a store-bought one, prepare the pie crust a couple of days ahead.
 
Finally, although you need to free yourself of commitments on your cooking day, the day will go much more easily if you feel free to take a break to tend to the children's needs, make a phone call, or just sit down to rest! Wear shoes that give your feet good support. Listen to your favorite music. Crack open a kitchen window for ventilation and to let the good smells pour out.
 
The secret of the method involves doing all similar processes at once: browning ground beef and chopping onions and cooking chicken only once rather than several times a month. Imagine the hours this saves!
 
Grocery Shopping Hints
 
Before you go to the supermarket or warehouse store, read the grocery and staples lists for the menu cycle you plan to use. The staples list contains items you need but probably have on hand. Look through your cupboards and add any missing staple items to the grocery shopping list. Also check the list of suggested freezer containers to see if you need to buy any of them.
 
For added convenience, photocopy the grocery list that we provide, then write in the other staple items or containers you'll need to buy. The grocery lists have been categorized by sections of food to help speed you through the store.
 
If you shop for a one-month menu cycle, you will have to push one cart and pull another. You may need to budget more carefully in order to set aside the funds needed to purchase food for all your dinner entrées at once. But keep in mind that over the course of the month you will save money on your food bill by cooking this way, since you'll be buying in bulk, eating out less often, and eliminating unplanned trips to the supermarket.
 
Your shopping trip will take you a couple of hours, so don't try to wedge it between two appointments. If you take young children, be sure to go when everyone is well fed and rested. It also helps to break up the trip. For example, go at midmorning to a discount food store to buy in bulk, have lunch at a favorite spot, and then finish any leftover shopping at the supermarket. Since this will be a lengthy shopping trip, plan your route through the supermarket so you visit the meat and dairy aisles last. If a friend or relative can baby-sit for you on shopping day, you will accomplish more in less time.
 
When you get home from shopping, you don't have to put everything away. Stack the canned goods and dry ingredients on a table or counter because you'll be using them soon. Keeping them within sight can inspire you for the task ahead!
 
The grocery shopping lists include some items with asterisks (*). These can be stored, because you will not need them until the day you serve the corresponding entrée. Mark the labels of these items to remind you not to use them by mistake.
 
The Day Before Cooking Day
 
After you've returned from the grocery store, clear off the kitchen counters, removing any appliances you won't be using. Create as much free countertop space as you can. Then, following the “Equipment Needed for Cooking Day” list, pull out your food processor, mixer, bowls—the tools you will need. If you have room, you may also want to get out the staple items.
 
Make sure you have all needed groceries on hand. Then perform the tasks that your chosen menu cycle outlines for “The Day Before Cooking Day.”
 
If you don't have a food processor to chop and slice the vegetables, you may want to cut them up the day before cooking, since this is one of the most time-consuming tasks. Then store these vegetables (except mushrooms) in the refrigerator in cold water inside tightly sealed plastic containers. Or omit the water and seal them in zip-closure bags.
 
Finally, check the list of freezer containers needed for the entrées in your menu cycle and get out the ones you'll need. You can usually store entrées in freezer bags, unless they are layered (like lasagna) or contain a lot of liquid. Food stored in freezer bags can be thawed in the bag and then warmed in a suitable container.
 
Cooking Day
 
The assembly order for each menu cycle is a step-by-step guide to preparing all your entrees. Read through the assembly order before you start to cook. Since you will usually be working on more than one recipe at a time, getting an overview will give you a sense of how the steps flow together.
 
The following suggestions will help make this method work best for you:
 
Place an empty trash can in the center of the kitchen, and corral the pets where they won't be underfoot. You'll want to avoid wasted motion wherever possible on cooking day.
 
Use a timer—or two timers—to remind you something is in the oven or boiling for a certain length of time.
 
Pause to wash pots and pans as necessary. Washing dishes and wiping up periodically as you work will help you work more efficiently and make end-of-the-day cleanup easier.
 
If you sauté several food items in succession, use the same skillet. Sometimes you'll only need to wipe it out and put in the next ingredients. Put a Crock-Pot to work by using it overnight for brisket, for example, and then for soup or stew on cooking day.
 
Set frequently used spices in a row at the back of your work area. Use one set of measuring cups and spoons for wet ingredients and another for dry. That way you'll need to wash them less often.
 
You will perform all similar tasks at once. For example, do all the grating, chopping, and slicing of the carrots, celery, cheese, and onions. Set them aside in separate bowls or plastic bags. Cook all the chicken if you didn't do that the day before. Brown all the ground beef and sauté all the onions at one time. These tasks may seem tedious, but you will have accomplished a lot when you're finished, and assembling the dishes will go much faster.
 
At the close of your cooking day, save leftover sliced or diced vegetables and cooked meat for a soup, a salad, or for snacks.
 
Food Storage and Freezer Tips
 
As you complete recipes, set them aside on a table to cool. When two or three have cooled, label each with the name of the entrée, the date you prepared it, and reheating instructions so you won't have to consult the recipe when you are preparing to serve it. For example:
 
Aztec Quiche
 
10/08
 
Bake uncov. 40–50 mins. at 325°F
 
If a recipe calls for cheese to be sprinkled on top the last few minutes of baking, seal the grated cheese in a small freezer bag. Then tape the bag to the side or top of the corresponding entrée's container so that you are freezing the two together.
 
Make the best use of your 13¥11¥2-inch baking dishes. Spray a dish with nonstick spray, line the dish with heavy aluminum foil, seal the entrée, and freeze it. When the entrée has frozen completely, remove it in the foil and return it to the freezer.
 
When sealing food for freezing, remove as much air from the container as possible and seal it airtight. This will help guard against the cardboardlike taste called freezer burn. When using freezer bags, label the bag with an indelible marker before you insert the food.
 
Post the menu of foods you've prepared on your freezer or inside a cupboard door to help you choose each day's dinner and to keep an inventory of what entrées you've used. Check off the dishes as you serve them. For the freshest taste, seal containers airtight and use them within a month to six weeks. (For additional freezer storage tips, see chapter 10.)
 
Serving Suggestions
 
Remember each evening to pull the next night's entrée from the freezer and put it in the refrigerator to thaw. If the food is in a freezer bag, set the bag in a casserole dish to thaw, in case any liquid leaks out. You can also thaw the dish in the microwave the next day. Use the rule of thumb that by 9:00 a.m. you'll have decided what you'll serve for dinner that night.
 
Each recipe includes suggestions for salads or vegetables you might serve with the entrées. You'll find some of those recipes in chapter 8. Now that you've saved time on your entrées, try some new salads, vegetables, or desserts, whether you have company or the same familiar faces around your table.
 
You'll spend less time in the kitchen during the coming weeks. You will save time, money, and energy that you can invest in many other ways. Imagine how good it will feel to have entrées on hand, and to have an immediate answer to each day's nagging question “What's for dinner?”
 
Let's get cooking!
 
Equipment Needed for Cooking Day
 
On cooking day, you'll want to reuse bowls and pans as much as possible to conserve counter and stovetop space. The following equipment will be needed for most cooking cycles.
 
Appliances
 
blender or hand mixer
 
Crock-Pot
 
food processor or grater
 
Pots, Pans, and Skillets
 
1 extra-large pot, canning kettle, or 2 large pots
 
1 large saucepan with lid
 
1 medium saucepan with lid
 
1 small saucepan
 
1 large skillet
 
1 medium skillet
 
1 or 2 rimmed baking sheets
 
Bowls and Containers
 
1 set of large, medium, and small mixing bowls
 
8 to 12 small-to-medium bowls or plastic bags (for grated, sliced, or chopped ingredients)
 
heavy-duty aluminum foil
 
freezer bags—both gallon and quart bags
 
Miscellaneous Tools
 
can opener
 
colander
 
cutting board
 
hot pads (oven mitts)
 
kitchen scissors
 
knives (cutting and paring)
 
ladle
 
2 sets measuring cups (one for wet ingredients and one for dry)
 
2 sets measuring spoons
 
metal or plastic serving spatula
 
mixing spoons
 
Miscellaneous Tools (continued)
 
rolling pin
 
rubber gloves (for deboning chicken and mixing food with your hands)
 
rubber spatula
 
tongs
 
vegetable peeler
 
wire whisk
 
 
Copyright © 2007 by Mimi Wilson and Mary Beth Lagerborg.
All rights reserved.


Supplemental Materials

What is included with this book?

The New copy of this book will include any supplemental materials advertised. Please check the title of the book to determine if it should include any access cards, study guides, lab manuals, CDs, etc.

The Used, Rental and eBook copies of this book are not guaranteed to include any supplemental materials. Typically, only the book itself is included. This is true even if the title states it includes any access cards, study guides, lab manuals, CDs, etc.

Excerpts

Chapter One Getting Ready: An Overview of the Once-a-Month Plan This cooking method enables you to prepare either a month’s or two weeks’ main dishes at once and freeze them. It includes two choices of one-month cycles and three choices of two-week cycles. If you rotate among these, you can easily provide great mealtime variety. We suggest that you start with a cycle from the book to get used to the method. Then you can experiment with adding family-favorite recipes. Turn to chapter 9 for help in adapting the method to your own recipes. Each of the menu cycles gives you a menu calendar that shows the month’s entrées at a glance, a grocery shopping list, a list of staples you should have on hand (add to the grocery list any you don’t have), a list of the containers you will need for freezing the entrées, step-by-step instructions for preparing the recipes in sequence on your cooking day, and finally the recipes themselves, in the order you will prepare them. To serve an entrée, you will need to thaw the dish and heat it. While it is being heated, you can prepare a vegetable, salad, or perhaps a dessert to serve with it. The time-consuming preparation and cleanup is done all at once on your megacooking day! Since many of the entrées can be frozen in freezer bags instead of bulkier hard-sided containers, even a month’s cycle can be stored in the freezer section of your refrigerator. Just make sure you make room by cleaning it out before your cooking day. Sooner or later we need to deal with those hard knots of leftovers anyway! Right after cooking day you will probably not have room in the refrigerator’s freezer for things like ice cream and loaves of bread, but as you use entrées from the freezer you can add these to it. The recipes in Once-a-Month Cooking come not from stainless-steel test kitchens, but have been tested numerous times in homes by cooks of varying skills. We have selected recipes we think your family will eat and enjoy. They were chosen for taste, variety, nutritional value, easily available ingredients, and how well they lend themselves to freezing. You will find that the recipes vary in serving size. The average is 5 or 6 servings. Some serve 4; a few serve 12. Depending on the ages (and eating habits) of your children, if you have four or fewer family members, you may want to divide and freeze each larger-serving entrée in two or more meal-size portions. The largest recipes are great for serving to company or ensuring leftovers the following day. You may find that the one-month menu cycle actually feeds your family for five or six weeks or more—particularly if you occasionally eat out or supplement your menu with dinner salads or easy meals like grilled meats and vegetables. Chapter 8 provides creative ways to serve fresh seasonal vegetables and other accompaniments with your entrées—as well as a few sweet treats to have on hand in your freezer. We think you will be as excited as we are about the wealth of ideas presented by our friend Rebecca Pasquariello, chef and owner of Savor Fresh Foods. Consult chapter 10 for helpful information on such things as freezing tips and food-measurement equivalents. Are you ready to cook? Or at least ready to think about getting ready to cook? Here are some tips to streamline the process. First, read this introductory material. Then choose which menu cycle you would like to try this month and read through that chapter so you’ll know what’s ahead. Next comes the hardest part: mark off the time on your calendar to grocery shop and cook! These should be on adjacent days. Don’t try to shop and cook on the same day, especially if you have young children, or you won’t like us very much! You simply won’t have the time or energy to do both. You might also not like us about four hours into your cooking day, when your feet are complaining and every pot and pan you own is dirty. But we are consoled by the thought that you will like us very much when you peek at your larder, carefully labeled and layered in your freezer, as well as each day thereafter at about 5:00 p.m. The one-month cycles require about a nine-hour day (of course this varies with the cook). The two-week cycles take about five hours. Cook with a friend or your spouse or an older child. The day goes so much more quickly when you divide the work and add conversation. If you have young children, a cooking companion can help tend the kids, answer the phone, and wipe the counters. You can either divide the food between your two families or cook one day a month at your friend’s home and one day a month at your own. Trust us that you will want to go out to dinner on cooking day! Yes, we know you will have plenty on hand for dinner. But you won’t want to face any of it on your plate. This will pass. Go out, then have your spouse and kids wash the pots and pans. Err on the side of buying a little more produce, chicken, and ground beef than is called for on your shopping lists. You can always use these for salads, soups, and sandwiches. If you have chicken broth left over, freeze it in an ice cube tray. When the cubes are frozen, pop them into a freezer bag. You can pull out a cube when a recipe calls for chicken broth, or make spur-of-the-moment chicken soup with leftovers. You may want to photocopy the recipes and attach them to large index cards. In many cases you will be working on more than one recipe at a time. You can lay out your recipe cards in sequence to save you from having to keep turning the pages. Don’t even think about trying to do extra baking on your cooking day. If you enjoy making pie crust and want to use your own rather than a store-bought one, prepare the pie crust a couple of days ahead. Finally, although you need to free yourself of commitments on your cooking day, the day will go much more easily if you feel free to take a break to tend to the children’s needs, make a phone call, or just sit down to rest! Wear shoes that give your feet good support. Listen to your favorite music. Crack open a kitchen window for ventilation and to let the good smells pour out. The secret of the method involves doing all similar processes at once: browning ground beef and chopping onions and cooking chicken only once rather than several times a month. Imagine the hours this saves! Grocery Shopping Hints Before you go to the supermarket or warehouse store, read the grocery and staples lists for the menu cycle you plan to use. The staples list contains items you need but probably have on hand. Look through your cupboards and add any missing staple items to the grocery shopping list. Also check the list of suggested freezer containers to see if you need to buy any of them. For added convenience, photocopy the grocery list that we provide, then write in the other staple items or containers you’ll need to buy. The grocery lists have been categorized by sections of food to help speed you through the store. If you shop for a one-month menu cycle, you will have to push one cart and pull another. You may need to budget more carefully in order to set aside the funds needed to purchase food for all your dinner entrées at once. But keep in mind that over the course of the month you will save money on your food bill by cooking this way, since you’ll be buying in bulk, eating out less often, and eliminating unplanned trips to the supermarket. Your shopping trip will take you a couple of hours, so don’t try to wedge it between two appointments. If you take young children, be sure to go when everyone is well fed and rested. It also helps to break up the trip. For example, go at midmorning to a discount food store to buy in bulk, have lunch at a favorite spot, and then finish any leftover shopping at the supermarket. Since this will be a lengthy shopping trip, plan your route through the supermarket so you visit the meat and dairy aisles last. If a friend or relative can baby-sit for you on shopping day, you will accomplish more in less time. When you get home from shopping, you don’t have to put everything away. Stack the canned goods and dry ingredients on a table or counter because you’ll be using them soon. Keeping them within sight can inspire you for the task ahead! The grocery shopping lists include some items with asterisks (*). These can be stored, because you will not need them until the day you serve the corresponding entrée. Mark the labels of these items to remind you not to use them by mistake. The Day Before Cooking Day After you’ve returned from the grocery store, clear off the kitchen counters, removing any appliances you won’t be using. Create as much free countertop space as you can. Then, following the “Equipment Needed for Cooking Day” list, pull out your food processor, mixer, bowls—the tools you will need. If you have room, you may also want to get out the staple items. Make sure you have all needed groceries on hand. Then perform the tasks that your chosen menu cycle outlines for “The Day Before Cooking Day.” If you don’t have a food processor to chop and slice the vegetables, you may want to cut them up the day before cooking, since this is one of the most time-consuming tasks. Then store these vegetables (except mushrooms) in the refrigerator in cold water inside tightly sealed plastic containers. Or omit the water and seal them in zip-closure bags. Finally, check the list of freezer containers needed for the entrées in your menu cycle and get out the ones you’ll need. You can usually store entrées in freezer bags, unless they are layered (like lasagna) or contain a lot of liquid. Food stored in freezer bags can be thawed in the bag and then warmed in a suitable container. Cooking Day The assembly order for each menu cycle is a step-by-step guide to preparing all your entrees. Read through the assembly order before you start to cook. Since you will usually be working on more than one recipe at a time, getting an overview will give you a sense of how the steps flow together. The following suggestions will help make this method work best for you: Place an empty trash can in the center of the kitchen, and corral the pets where they won’t be underfoot. You’ll want to avoid wasted motion wherever possible on cooking day. Use a timer—or two timers—to remind you something is in the oven or boiling for a certain length of time. Pause to wash pots and pans as necessary. Washing dishes and wiping up periodically as you work will help you work more efficiently and make end-of-the-day cleanup easier. If you sauté several food items in succession, use the same skillet. Sometimes you’ll only need to wipe it out and put in the next ingredients. Put a Crock-Pot to work by using it overnight for brisket, for example, and then for soup or stew on cooking day. Set frequently used spices in a row at the back of your work area. Use one set of measuring cups and spoons for wet ingredients and another for dry. That way you’ll need to wash them less often. You will perform all similar tasks at once. For example, do all the grating, chopping, and slicing of the carrots, celery, cheese, and onions. Set them aside in separate bowls or plastic bags. Cook all the chicken if you didn’t do that the day before. Brown all the ground beef and sauté all the onions at one time. These tasks may seem tedious, but you will have accomplished a lot when you’re finished, and assembling the dishes will go much faster. At the close of your cooking day, save leftover sliced or diced vegetables and cooked meat for a soup, a salad, or for snacks. Food Storage and Freezer Tips As you complete recipes, set them aside on a table to cool. When two or three have cooled, label each with the name of the entrée, the date you prepared it, and reheating instructions so you won’t have to consult the recipe when you are preparing to serve it. For example: Aztec Quiche 10/08 Bake uncov. 40–50 mins. at 325°F If a recipe calls for cheese to be sprinkled on top the last few minutes of baking, seal the grated cheese in a small freezer bag. Then tape the bag to the side or top of the corresponding entrée’s container so that you are freezing the two together. Make the best use of your 13¥11¥2-inch baking dishes. Spray a dish with nonstick spray, line the dish with heavy aluminum foil, seal the entrée, and freeze it. When the entrée has frozen completely, remove it in the foil and return it to the freezer. When sealing food for freezing, remove as much air from the container as possible and seal it airtight. This will help guard against the cardboardlike taste called freezer burn. When using freezer bags, label the bag with an indelible marker before you insert the food. Post the menu of foods you’ve prepared on your freezer or inside a cupboard door to help you choose each day’s dinner and to keep an inventory of what entrées you’ve used. Check off the dishes as you serve them. For the freshest taste, seal containers airtight and use them within a month to six weeks. (For additional freezer storage tips, see chapter 10.) Serving Suggestions Remember each evening to pull the next night’s entrée from the freezer and put it in the refrigerator to thaw. If the food is in a freezer bag, set the bag in a casserole dish to thaw, in case any liquid leaks out. You can also thaw the dish in the microwave the next day. Use the rule of thumb that by 9:00 a.m. you’ll have decided what you’ll serve for dinner that night. Each recipe includes suggestions for salads or vegetables you might serve with the entrées. You’ll find some of those recipes in chapter 8. Now that you’ve saved time on your entrées, try some new salads, vegetables, or desserts, whether you have company or the same familiar faces around your table. You’ll spend less time in the kitchen during the coming weeks. You will save time, money, and energy that you can invest in many other ways. Imagine how good it will feel to have entrées on hand, and to have an immediate answer to each day’s nagging question “What’s for dinner?” Let’s get cooking! Equipment Needed for Cooking Day On cooking day, you’ll want to reuse bowls and pans as much as possible to conserve counter and stovetop space. The following equipment will be needed for most cooking cycles. Appliances blender or hand mixer Crock-Pot food processor or grater Pots, Pans, and Skillets 1 extra-large pot, canning kettle, or 2 large pots 1 large saucepan with lid 1 medium saucepan with lid 1 small saucepan 1 large skillet 1 medium skillet 1 or 2 rimmed baking sheets Bowls and Containers 1 set of large, medium, and small mixing bowls 8 to 12 small-to-medium bowls or plastic bags (for grated, sliced, or chopped ingredients) heavy-duty aluminum foil freezer bags—both gallon and quart bags Miscellaneous Tools can opener colander cutting board hot pads (oven mitts) kitchen scissors knives (cutting and paring) ladle 2 sets measuring cups (one for wet ingredients and one for dry) 2 sets measuring spoons metal or plastic serving spatula mixing spoons Miscellaneous Tools (continued) rolling pin rubber gloves (for deboning chicken and mixing food with your hands) rubber spatula tongs vegetable peeler wire whisk  Copyright © 2007 by Mimi Wilson and Mary Beth Lagerborg.All rights reserved.
 

Excerpted from Once-A-Month Cooking: A Proven System for Spending Less Time in the Kitchen and Enjoying Delicious, Homemade Meals Every Day by Mimi Wilson, Mary Beth Lagerborg
All rights reserved by the original copyright owners. Excerpts are provided for display purposes only and may not be reproduced, reprinted or distributed without the written permission of the publisher.

Rewards Program