did-you-know? rent-now

Amazon no longer offers textbook rentals. We do!

did-you-know? rent-now

Amazon no longer offers textbook rentals. We do!

We're the #1 textbook rental company. Let us show you why.

9780982732267

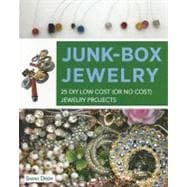
Junk-Box Jewelry 25 DIY Low Cost (or No Cost) Jewelry Projects

by
  • ISBN13:

    9780982732267

  • ISBN10:

    0982732260

  • Format: Paperback
  • Copyright: 2012-06-26
  • Publisher: Zest Books
  • Purchase Benefits
  • Free Shipping Icon Free Shipping On Orders Over $35!
    Your order must be $35 or more to qualify for free economy shipping. Bulk sales, PO's, Marketplace items, eBooks and apparel do not qualify for this offer.
  • eCampus.com Logo Get Rewarded for Ordering Your Textbooks! Enroll Now
List Price: $14.99

Summary

This beautifully illustrated guide shows teens how to create eye-catching jewelry out of found or recycled objectsat very little cost. Some fun projects include making pendants out of pebbles; sewing a stylish cuff using scraps of fabric; and fashioning a funky charm bracelet out of extra screws, washers, and other toolbox trinkets. The easy-to-follow, step-by-step instructions are suitable for both beginner- and intermediate-level crafsters. This book also provides bonus tips on the tools you need to get started, where to find materials, and how to make money from your jewelry.

Table of Contents

Getting Startedp. 10
What You'll Needp. 12
Where to Lookp. 16
Vintage Glamourp. 20
Retro-Bauble Braceletp. 22
Vintage Braided Chokerp. 24
Bling Ringp. 27
Royal Jewels Necklacep. 30
Vintage Lace Chokerp. 33
Beach Findsp. 36
Sea-Jewel Pendantp. 38
Colorful Recycled Necklacep. 41
Ocean's Charm Braceletp. 44
Fishing-Net Cuffp. 45
Sea-Jewel Cuffp. 50
Sixties String-Art Necklacep. 54
Use What You Havep. 56
Elegant First-Date Earringsp. 58
Art Nouveau Pendantp. 60
Jeweled Branches Necklacep. 63
Newsstand Necklacep. 66
Toolbox Braceletp. 68
Customized Cuffp. 70
Juliet Tiarap. 72
So-Quirky-lt's-Cool Necklacep. 75
Diva Designsp. 78
Billie Holiday Headbandp. 80
Sparkle-and-Chain Necklacep. 83
Art Deco Braceletp. 86
Sparkling Vines Headbandp. 89
Antique Lace Headbandp. 92
Golden Touch Tiarap. 95
Useful Websitesp. 100
Indexp. 102
Table of Contents provided by Ingram. All Rights Reserved.

Supplemental Materials

What is included with this book?

The New copy of this book will include any supplemental materials advertised. Please check the title of the book to determine if it should include any access cards, study guides, lab manuals, CDs, etc.

The Used, Rental and eBook copies of this book are not guaranteed to include any supplemental materials. Typically, only the book itself is included. This is true even if the title states it includes any access cards, study guides, lab manuals, CDs, etc.

Excerpts

WHAT YOU’LL NEEDThe good news? You probably already have most of the stuff you need to make awesome jewelry. The bad news? Okay, there’s actually no bad news. You may just have to buy some supplies on the cheap from your local craft store or online (see the "Useful Websites" section on page 100 at the back of the book).

TOOLS

Pliers
This’ll be your most-used tool and you can get a great pair for under $10 (look for the kind that have a wire cutter). Use them to shape, bend, and cut wire. We recommend buying two pairs of pliers (try one pair of round-nosed and one pair of flat-nosed pliers) because it makes tasks like bending open jump rings (see page 14) aloteasier. Also, use the round-nosed pliers when making loops and curves and the flat-nosed pair to grip/hold the wire and when using crimps (see page 14).ScissorsAlways good to have around, these come in handy for projects that use fabric and lace. One larger pair of shears and a smaller pair of nail or manicure scissors are all you need for the projects in this book.Dremel Tool or Hand DrillThere are a few projects in this book that call for drilling holes in plastic pieces so that you can string them on necklaces and bracelets. If you’re a crafty person always making something, you may be ready to invest in a Dremel tool— it does everything you can imagine, from drilling to sanding and polishing. You can usually find one for around $50. (You could probably convince Mom or Dad that it’s a great thing to have around the house.) If you do use a drill for these projects, remember toalwayswear safety goggles andalwaysget an adult to help. No drill? No problem. There’s this magical stuff called Shrinky Dinks (see "Useful Websites" on page 100 for ordering info). It’s basically plastic that you can cut and design any way you like, then pop in the oven and shrink to beautiful, jewelry-sized proportions. Just remember to put your holes in the plastic (use a standard paper hole punch) before you bake it. Ta-da. All ready to go and you didn’t have to drill a thing.File

There are lots of projects in this book that use jewelry wire. It’s a great material, but the ends can be a little sharp. It’s a good idea with any of the wire projects to file down sharp edges so that they don’t scratch your skin. Use a nail file or a piece of fine sandpaper.Crochet Hook

Different sizes will give you different looks. For a looser woven design, get a bigger hook. For a tighter weave, go smaller. These are available at any craft or sewing store, and you can get a set of different sized plastic hooks pretty inexpensively.Glue

Helps you keep it together. For the projects in this book, you’ll need regular white glue, super glue, and some clear-drying craft glue.OTHER DOODADS

Lobster Clasps

No, they don’t taste good when dipped in butter, but these little clasps are the perfect way to keep your necklaces and bracelets securely attached to your neck and wrists. Shaped a little like lobster claws, you can find these in almost any craft store, and they’re easy to attach to your projects using jump rings (see page 14).

Jump Rings

They look totally boring, but they’re the secret weapon in any jewelry-making genius’ arsenal. You can use these small metal rings to connect chains to beads, clasps to chains … anything to anything, really. Using two sets of pliers, bend open the rings, slide on whatever you need to attach, then bend them closed again. Voilà!Jewelry Wire

If you want to be super fancy, you can find sterling silver and real gold jewelry wire, but it’s a lot cheaper to get the silver- or gold-coated brass or copper wire and it works just as well. Each individual project will specify the gauge, or thickness, of the wire you’ll need. No matter what the project says, the key is to find the right wire to thread through the holes of the beads you want to use. If you’re not sure, bring your beads to a craft store, and try it out. If you get in the swing of things and start making lots and lots of projects, consider buying big spools of wire. It’ll save you a bundle.Beading Wire

Beading wire is an alternative to chain and perfect for stringing together lots of beads or other interesting finds. It’s basically wire coated with nylon so it’s nice and smooth. You’ll be using crimps or crimp beads (see below) to secure your designs when you use beading wire. Beadalon is a common brand that you can find at your local craft store. Like jewelry wire, beading wire comes in different gauges, so make sure that your beads will fit. And just like jewelry wire, you can get discounts when you buy big spools of it.Crimps/Crimp Beads

You can get these little beads in silver or gold. Once you string on beads or whatever finds you may want to add to your jewelry projects, you’ll secure them by using your flat-nosed pliers to flatten the crimp bead to the wire.Chain/Extender Chain

For most of the necklace and bracelet projects in this book, you can recycle old necklaces and bracelet chains that you already have. If you don’t have any that you’re willing to slice and dice, buy some extender or regular chain (you can buy it by the foot) at your local craft store or online. The great part about recycling a chain is that it already comes with the clasp on it. If you have to add your own clasp, just slide it on a jump ring and attach that to the last link in your chain.Earring Hooks

The trick to making any earring project super easy. Available at any craft store in silver or gold, they have little loops at their base so that they’re ready to attach beads to a jump ring, or have wire strung right through them.Plain Headband/Tiara Bases

Simple metal headbands and tiaras (without any decoration) are available at most craft stores in silver and gold. If you have trouble finding tiara bases, you can take a headband base and bend it into a more circular shape. That should work just fine for your highness.Brooch(es)

Just another word for pin. Vintage brooches are the key to making a lot of the projects in this book super fabulous. VINTAGE BRAIDED CHOKER

YOU WILL NEED:

A Three 27 in. (70 cm) pieces of 0.6 mm wireA Masking tapeA 30–50 beadsA A necklace chain or ribbonA Pliers This choker is the magical solution for those situations when you’re stuck wearing something totally boring to a family wedding or school concert. And no, it’s not magic in the get-you-out-of-having-to-go-to-that-boring-event kinda way, but we promise you’ll have a better time with this beauty around your neck. For a sophisticated look, use beads that are roughly the same size and color (crystals or pearls = glamorous)—then you can attach an antique brooch as a centerpiece. Or, for funkier flair, mix and match different beads or stones. 1.Hold the three pieces of wire together with the pliers and use your fingers to wrap one of the wires around the other two about four times, leaving 1–1 1/2 in. (about 3–4 cm) of wire above the wrapping, so that you can make a loop at the end to attach the necklace chain later.2.Cut off the tail end of your wrapping wire and use masking tape to stick the bundle of wires to a table or tray, like you would when weaving a friendship bracelet. Now you’re ready to start braiding.3.Thread a bead onto the right-hand wire. In the same way that you would braid hair, cross the beaded wire over the middle wire so that it becomes the new middle wire..4.Thread a bead onto the left-hand wire and cross it over the middle wire so that it becomes the new middle wire. The first few beads might be tricky to keep in place. They should sit at a slight diagonal from each other. When your cross your wires you want them tight enough to keep the beads from sliding around on the wires, but loose enough that they don’t push the beads out of place. It might take a few tries to get the tension just right.5.Continue threading beads onto the side wires and braiding. Add a bead each time you cross a wire.6.Stop braiding about 1 in. (3 cm) before the necklace is the right size for you. This gives you room to make a loop to attach to the necklace chain or ribbon. To finish off the necklace, braid the wires once more without adding any beads.7.To secure the end, wrap one wire around the other two just like you did at the beginning, then wrap one of the two remaining wires around the last one, leaving you with just one length of wire.8.Cut your necklace chain at the middle point so you have two lengths of chain connected by the clasp. You might need to shorten the chains depending on how low you want the necklace to hang.9.Start to bend the necklace’s wire tail into a loop, thread it onto one end of the chain, and bend the loop closed by wrapping the wire back around itself. You can pinch it tightly with your pliers to make it more secure. Do the same on the other side of the necklace, attaching that wire tail to the necklace chain. If you want to fasten the necklace with ribbon instead, just thread your ribbon through the loops and tie a neat knot.

Rewards Program