did-you-know? rent-now

Rent More, Save More! Use code: ECRENTAL

did-you-know? rent-now

Rent More, Save More! Use code: ECRENTAL

5% off 1 book, 7% off 2 books, 10% off 3+ books

9781119724148

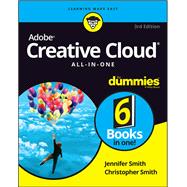
Adobe Creative Cloud All-in-One For Dummies

by ;
  • ISBN13:

    9781119724148

  • ISBN10:

    1119724147

  • Edition: 3rd
  • Format: Paperback
  • Copyright: 2021-04-13
  • Publisher: For Dummies

Note: Supplemental materials are not guaranteed with Rental or Used book purchases.

Purchase Benefits

  • Free Shipping Icon Free Shipping On Orders Over $35!
    Your order must be $35 or more to qualify for free economy shipping. Bulk sales, PO's, Marketplace items, eBooks and apparel do not qualify for this offer.
  • eCampus.com Logo Get Rewarded for Ordering Your Textbooks! Enroll Now
List Price: $49.99 Save up to $35.56
  • Rent Book $20.00
    Add to Cart Free Shipping Icon Free Shipping

    TERM
    PRICE
    DUE
    IN STOCK USUALLY SHIPS IN 24 HOURS.
    HURRY! ONLY 1 COPY IN STOCK AT THIS PRICE
    *This item is part of an exclusive publisher rental program and requires an additional convenience fee. This fee will be reflected in the shopping cart.

How To: Textbook Rental

Looking to rent a book? Rent Adobe Creative Cloud All-in-One For Dummies [ISBN: 9781119724148] for the semester, quarter, and short term or search our site for other textbooks by Smith, Jennifer; Smith, Christopher. Renting a textbook can save you up to 90% from the cost of buying.

Summary

Fly higher in your Creative Cloud

Adobe Creative Cloud makes the most popular tools used by designers, photographers, and other creative professionals accessible in a single place. Adobe Creative Cloud All-in-One For Dummies is the ultimate one-stop reference guide for how to use them all. Whatever gets your creative juices flowing, you'll find the in-depth guidance required to deliver the results you want, from polishing-up photos and images to creating illustrations and designs. And once your assets are just how you want them, you can pick up best practices for managing and publishing via the amazing Adobe Bridge.

Written by pro designers for those getting started with this powerful set of tools, this book gives you an overview of Creative Cloud and step-by-step coverage of the major applications—InDesign, Illustrator, Photoshop, Acrobat Pro, and Adobe XD, and Adobe Bridge—in seven mini-books that take you from the basics to more advanced topics. You'll also discover how to get your work noticed by building personal galleries and displaying your creative wares.

  • Find the essentials on the top tools in Adobe Creative Cloud
  • Build and enhance your design skills
  • Protect your documents with Acrobat Pro
  • Get the most out of each program with insider tips

Whatever your skill level and project needs, you'll find the essentials you need to demystify these complex programs and the knowledge to make your work shine even more brightly through the Cloud!

Author Biography

Jennifer Smith is the director of user experience design practice at the American Graphics Institute. She is also a designer, consultant, educator, mentor, and author of over a dozen books on digital imaging and web publishing.

Christopher Smith is president of the American Graphics Institute. He is author of more than ten books on digital publishing, including many of the Adobe official training guides.

Table of Contents

Introduction 1

Why is It Important? 2

About This Book 2

Foolish Assumptions 4

Icons Used in This Book 4

Beyond the Book 4

Where to Go from Here 5

Book 1: Getting Started With the Creative Cloud Suite 7

Chapter 1: The Creative Cloud 9

Applications Covered in This Book 10

Crossing the Adobe Bridge 11

Getting started with Photoshop CC 11

Introducing InDesign CC 11

Using Illustrator CC 12

Working with Acrobat DC 13

Prototyping your apps with Adobe XD 14

Integrating software 15

Acquiring assets for this book 15

Chapter 2: Creative Cloud Application Management 17

Downloading Your First App 17

Checking for updates 19

Getting started 20

Chapter 3: Creative Cloud Extras for You 21

Launching the Creative Cloud App 22

Apps 22

Categories 23

Managing Your Fonts 24

Resource Links 24

Your Work 25

Libraries 25

Show Cloud Documents 29

Discovering Design Opportunities with New Fonts 32

Finding Images with Adobe Stock 33

Promoting Yourself with Behance 34

Creating a Cover 36

Bonus! Adobe Portfolio 37

It’s Not Just Apps! 38

Chapter 4: Using Common Menus and Commands 39

Discovering Common Menus 39

Using Dialog Boxes 41

Encountering Alerts 43

Discovering Common Menu Options 44

About Contextual Menus 45

Using Common Keyboard Shortcuts 46

Changing Your Preferences 48

Chapter 5: Exploring Common Panels 51

Understanding the Common Workspace 51

Using Panels in the Workspace 53

Moving panels 54

Looking at common panels 55

Book 2: Adobe Bridge 57

Chapter 1: Organizing and Managing Your Files with Adobe Bridge 59

Getting to Know the Adobe Bridge Workspace 60

Practice makes perfect 62

Finding and using your folders within Adobe Bridge 62

The default workspace 64

Looking for a better view 65

Creating a new folder 66

Moving a file to another folder 67

Making a favorite 68

Investigating the Application bar 69

Developing a Bridge habit 69

Chapter 2: Taking Advantage of Metadata in Adobe Bridge 71

Locating Your Files 71

Using Keywords 74

Creating a Metadata Template 75

Searching for Files Using Adobe Bridge 77

Searching by name or keyword 77

Using the Filter panel 78

Saving a Collection 79

Chapter 3: Using Automation Tools in Adobe Bridge 81

Getting Files from Your Camera 81

Automation Tools in Adobe Bridge 83

Batch renaming your files 83

Exporting your files from Bridge 85

Loading files as layers 85

Building a contact sheet 86

Book 3: Photoshop CC 89

Chapter 1: Getting into Photoshop CC Basics 91

The Start Screen 91

The New Document Window 92

Sample Images Can Help You Investigate More Features 93

Opening an Image 94

Getting to Know the Tools 94

Navigating the Work Area 97

Changing your workspace 97

Resetting your workspace 99

Docking and saving panels 99

Saving your workspace 100

Taking advantage of workspace features 100

Zooming in to get a better look 100

Choosing Your Screen Mode 102

Getting Started with Basic Tasks in Photoshop CC 102

Cropping an image 102

Using grids as you crop 105

Using the Frame tool to create cropped images 106

Saving images 109

Chapter 2: Messing with Mode Matters 111

Working with Bitmap Images 111

Choosing the Correct Photoshop Mode 113

Bitmap 113

Grayscale 113

Duotone 114

Index color 117

RGB 117

CMYK 118

LAB color 118

Multichannel 119

Bit depth 119

Chapter 3: Making Selective Changes 121

Getting to Know the Selection Tools 121

The Marquee tool 122

The Lasso tool 125

The Object Selection tool 126

The Quick Selection tool 127

The Magic Wand tool 128

Painting a selection with the Quick Mask tool 129

Manipulating Selections with Refine Selection 132

Transforming selections 132

Transforming selections 132

Feathering 135

Tweaking the edges of a selection in the Select and Mask workspace 138

Selecting the Subject 143

Saving Selections 144

Chapter 4: Using the Photoshop Pen Tool 145

Selecting the Right Pen Tool for the Task 146

Using a Path as a Selection 146

Creating Curved Paths 148

Clipping Paths 150

Using Shape Layers 152

Creating and using a custom shape 153

Changing the color of the shape 155

Changing the color fill of a custom shape 156

Changing the stroke on a live vector shape 157

Creating a stroke on a custom shape 158

Removing a shape layer 159

Chapter 5: Creating Images in the Right Resolution for Print and the Web 161

Creating Images for Print 161

The resolution formula 163

Changing the resolution 163

Determining the Resolution for Web Images 166

Applying the Unsharp Mask Filter to an Image 167

Chapter 6: Creating a Good Image 169

Reading a Histogram 169

Breaking into key types 172

Starting the process to improve your image 174

Creating a Good Tone Curve 174

Finding the highlight and the shadow 176

Setting the highlight and shadow values 180

Adjusting the midtone 181

Finding a neutral 182

Editing an Adjustment Layer 184

Testing a Printer 185

Chapter 7: Working with Painting and Retouching Tools 187

Using the Swatches Panel 187

Choosing Foreground and Background Colors 188

The Painting and Retouching Tools 189

Changing the brush 190

The Spot Healing Brush tool and the Content-Aware feature 191

The Healing Brush tool 193

The Patch tool 194

The Red Eye tool 195

The Brush tool 195

The Clone Stamp tool 198

The History Brush tool 200

The Eraser tool 201

The Gradient tool 201

Blending Modes 204

Painting with color 206

Filling selections 207

Saving Presets 208

Chapter 8: Using Layers 209

Creating and Working with Layers 209

Duplicating a Layer 212

Selecting a Layer 212

Controlling the visibility of a layer 213

Rearranging the stacking order 213

Creating a Text Layer 213

Warping text 214

Fine-tuning text 214

Check that spelling! 215

Using Layer Masks 215

Creating a layer mask from a selection 216

Creating a vector mask from a pen path 218

Organizing Your Layers 220

Activating multiple layers simultaneously 220

Layer groups 220

Duplicating a layer group 221

Filter Capabilities in the Layers Panel 222

Merging and Flattening Images 222

Merging 223

Flattening 223

Chapter 9: Going Beyond the Basics with Layers 225

Using Layer Styles 225

Applying a style 225

Creating and saving a style 227

Thinking about opacity versus fill 228

Smart, Really Smart! Smart Objects 229

Finding Tools and Features That Are Hidden 230

Using the Frame Tool 231

Working with Artboards in Photoshop 232

Adding additional artboards 234

Adding content to the second artboard 234

Experimenting with 3D Files 237

Preserving Corrective Perspective with the Vanishing Point Feature 238

Chapter 10: Saving Photoshop Images for Print and the Web 243

Backing Up with a Save 244

Choosing a File Format for Saving 244

Wonderful and easy Photoshop PSD 245

Photoshop EPS 245

Photoshop PDF 245

TIFF 246

DCS 246

Saving Images for the Web 246

PNG 247

JPEG 248

GIF 250

Matte 254

Saving Settings 254

Book 4: InDesign CC 257

Chapter 1: Introducing InDesign CC 259

Getting Started with InDesign CC 259

Creating a new publication 260

Opening an existing publication 263

Touring the Workspace 263

Tools 265

Menus 266

Panels 267

Contextual menus 270

Setting Up the Workspace 271

Showing and hiding grids and guides 271

Snapping to a grid or a guide 272

Using Smart Guides 273

Customizing menus 274

Customizing the interface appearance 275

Saving a custom workspace 275

Working with Documents 276

Importing new content 277

Viewing content 278

Saving your publication 278

Chapter 2: Working with Text and Text Frames 281

Understanding Text, Font, and Frames 282

Creating and Using Text Frames 282

Creating text frames with the Type tool 283

Creating text frames with the Frame tool 284

Creating text frames from a shape 284

Adding Text to Your Publication 284

Importing text 285

Controlling text flow 285

Adding placeholder text 286

Copying and pasting text 287

Looking at Text Frame Options 287

Changing text frame options 288

Using and modifying columns 289

Modifying and Connecting Text Frames on a Page 290

Resizing and moving the text frame 291

Threading text frames 292

Adding a page jump number 295

Understanding Paragraph Settings 297

Indenting your text 297

Text alignment and justification 298

Saving a paragraph style 299

Editing Stories 300

Using the story editor 300

Checking for correct spelling 302

Using custom spelling dictionaries 302

Using Tables 303

Creating tables 303

Editing table settings 305

Creating table styles 306

Looking at Text on a Path 307

Chapter 3: Understanding Page Layout 309

Importing Images 309

Importing PDFs 311

Importing other InDesign documents 311

Linking and Embedding Images 312

Setting Image Quality and Display 314

Selecting Images 315

Manipulating Text and Graphics in a Layout 316

Page orientation and size 316

Margins, columns, and gutters 317

Using guides and snapping 317

Locking objects and guides 319

Merging Text and Graphics 320

Wrapping objects with text 320

Modifying a text wrap 322

Working with Pages and the Pages Panel 323

Selecting and moving pages 324

Adding and deleting pages 325

Numbering your pages 325

Using Master Spreads in Page Layout 326

Creating a master spread 327

Applying, removing, and deleting master pages 327

Changing individual page sizes 328

Chapter 4: Drawing in InDesign 329

Getting Started with Drawing 329

Paths and shapes 330

Points and segments 332

Getting to Know the Tools of the Trade 332

The Pencil tool 333

The Pen tool 333

Basic shapes and frame shapes 333

Drawing Shapes 334

Creating a shape with exact dimensions 334

Using the Polygon tool 335

Editing Basic Shapes 336

Changing the size with the Transform panel 336

Changing the size with the Free Transform tool 337

Creating your own custom shapes 337

Changing the stroke of a shape 339

Changing the shear value 340

Rotating a shape 340

Drawing Freeform Paths 340

Using the Pencil tool 340

Using the Pen tool 341

Editing Freeform Paths 342

Modifying Frame Corners 343

Using Fills 344

Creating basic fills 344

Making transparent fills 345

Filling with gradients 346

Removing fills 348

Adding Layers 349

Creating QR Codes 350

Chapter 5: Understanding Color 351

Selecting Color with Color Controls 351

Understanding Color Models 352

Using Color Swatches and Libraries 353

The Swatches panel 353

Swatch libraries 354

Chapter 6: Clipping Paths, Alignment, and Object Transformation 357

Working with Transformations 358

Looking at the Transform panel 358

Using the Free Transform tool 360

Rotating objects 361

Scaling objects 363

Shearing objects 363

Reflecting objects 364

Understanding Clipping Paths 365

Arranging Objects on the Page 366

Aligning objects 366

Distributing objects 367

Chapter 7: Exporting to PDF and Printing 369

Preflight: Preparing Your Documents for Printing 369

Packaging Your Documents 371

Understanding File Formats 372

Exporting Publications 374

Exporting PDF documents for printing 374

Exporting EPS files 376

Exporting JPEG and PNG files 377

Exporting text files 378

Printing Your Work 379

Understanding bleed 379

Doing it yourself: Printing and proofing at home or the office 380

Chapter 8: Creating Digital Documents Using EPUB and Publish Online 383

Choosing the Right Digital Format 384

Planning Layouts for Digital Distribution 384

Adapting Print Documents to Share Digitally 385

Creating liquid layout rules for alternative layouts 386

Creating alternate layouts 387

Adding interactivity to digital documents 389

Exporting Digital Books as EPUB 390

Preparing EPUB (Reflowable) Books 390

Exporting EPUB (Reflowable) Books 391

Exporting EPUB (Fixed-Layout) 393

Publish Online 394

Share for Review 396

Book 5: Illustrator CC 399

Chapter 1: Discovering Illustrator CC 401

Deciding When to Use Illustrator CC 401

Creating a New Document 403

Try a Template 407

Opening an Existing Document 407

Taking a Look at the Document Window 407

Navigating the Work Area with Zoom Controls 410

Taking Advantage of Artboards 411

Creating multiple artboards 412

Using the Artboard Panel 413

Printing a document with multiple artboards 414

Checking Out the Panels 415

Getting to Know Your Workspace 416

Becoming Familiar with the Tools 417

Changing Views 420

Chapter 2: Using the Selection Tools 423

Getting to Know the Selection Tools 423

Giving selections a try 424

Anchor points 425

Bounding boxes 426

Introducing all the selection tools 427

Working with Selections 428

More practice with selections 428

Selecting an anchor point 429

Using a marquee to select an object 430

Selecting multiple objects 431

Saving a selection 431

Grouping and Ungrouping 432

Creating a group 432

Using Isolation mode 433

Manipulating Selected Objects 433

Chapter 3: Creating Basic Shapes and Beyond 437

The Basic Shape Tools 437

Creating rectangles and ellipses 438

Working with the Live corners feature 439

The Rounded Rectangle tool 440

Using the Polygon tool 441

Using the Star tool 441

Resizing Shapes 442

Tips for Creating Shapes 444

Making some pies 444

Creating advanced shapes 445

Using the Pathfinders 446

Using the Shape Builder tool 447

Chapter 4: Using the Pen Tool and Integrating Images 449

Pen Tool Fundamentals 450

Creating a straight line 451

Creating a constrained straight line 453

Creating a curve 453

Reconnecting to an existing path 454

Controlling curves 455

Creating a corner point 456

Additional Pen Tools 457

Adding tools to help make paths 458

Using the Eraser tool 458

Tracing Artwork 460

Creating a template layer 460

Using Image Trace 461

Changing the view 463

Other Details You Should Know about Placing Images 463

Chapter 5: Using Type in Illustrator 465

Working with Type 465

Creating text areas 466

Creating a line of text 466

Flowing text into an area 467

Dealing with text overflow 467

Creating columns of text with the Area Type tool 467

Threading text into shapes 470

Wrapping text 471

Outlining text 472

Putting text on a path, in a closed shape, or on the path of a shape 474

Assigning Font Styles 476

Using the Character Panel 478

Using the Paragraph Panel 480

Alignment 481

Indentation 481

Text Utilities: Your Key to Efficiency 482

Find and Replace 482

Spell checker 482

The Hyphenation feature 483

The Find Font feature 484

The Change Case feature 485

Text styles 485

Chapter 6: Organizing Your Illustrations 491

Setting Ruler Increments 491

Using Guides 492

Creating a ruler guide 492

Creating a custom guide 493

Using the Properties Panel for Placement 493

Changing the Ruler Origin 494

What You Need to Know about Object Arrangement 494

Hiding Objects 496

Locking Objects 497

Creating a Clipping Mask 498

Creating a Mask of Illustrator Objects Using the Blend Tool 500

Creating a Clipping Path Using the Draw Inside Button 502

Chapter 7: Using Layers 505

Creating New Layers 506

Using Layers for Selections 510

Changing the Layer Stacking Order 511

Moving and Cloning Objects 512

Hiding Layers 512

Locking Layers 513

Chapter 8: Livening Up Illustrations with Color 515

Choosing a Document Profile 516

Using the Swatches Panel 517

Applying Color to the Fill and Stroke 519

Changing the Width and Type of a Stroke 519

Adding Arrowheads 522

Using the Color Panel 523

Saving Colors 524

Building and using custom libraries 524

Using the Color Guide and color groups 525

Editing or Applying Colors 526

Adding Pantone colors 527

Editing Colors 529

Building and Editing Patterns 530

Advanced Pattern Editing 532

Working with Gradients 534

Using the Gradient tool 537

Apply a gradient to a stroke 538

Using transparency in gradient meshes 538

Copying Color Attributes 540

Painting Made Easy: The Live Paint Feature 541

Chapter 9: Using the Transform and Distortion Tools 543

Working with Transformations 543

Transforming an object 544

Using the Transform tools 547

Creating Distortions 550

The Liquify tools 550

Using the Envelope Distort command 552

Chapter 10: Working with Transparency and Special Effects Tools 557

The Mesh Tool 557

The Blend Tool 561

Creating a blend 561

Setting Blend options 562

The Symbol Sprayer Tool 563

Exploring the symbol tools 563

Creating and spraying symbols on the artboard 565

Transparency 566

Blend modes 567

Opacity masks 568

Chapter 11: Using Filters and Effects 571

Working with Effects 571

Understanding the Appearance panel 572

Applying an effect 572

Adding a Drop Shadow effect 573

Saving your combination of effects as a graphic style 575

Saving Graphic Styles 576

Creating 3D Artwork 577

Adding Multiple Fills and Strokes 580

Using the Perspective Grid 583

Chapter 12: Using Your Illustrator Images 587

Saving and Exporting Illustrator Files 587

The native Adobe Illustrator file format 588

Saving Illustrator files back to previous versions 590

The PDF file format 590

The EPS file format 592

The SVG file format 593

Saving Your Artwork for the Web 594

Saving Multiple Assets out of Illustrator 597

Flattening Transparency 599

Flattening a file 599

Using the Flattener Preview panel 601

Printing from Illustrator 602

Book 6: Adobe XD 605

Chapter 1: Introducing the XD Workspace 607

Understanding the Modern User Interface 607

Creating a new artboard 608

Using the tools 610

Relating Objects to the Property Inspector 610

Centering an object on the screen 610

Using transform features 611

Fixing position when scrolling 612

Laying it all out 612

Changing the appearance of your object 614

A Little Bit about Artboards 616

Saving your file 617

Cloning your text objects to the first artboard 618

Duplicating your artboard 619

Creating a third artboard by cloning 620

Editing your text to fit the screens 621

Experimenting with artboard properties 621

Adding an image 621

Keyboard Shortcuts for Navigating the Workspace 623

Design View versus Prototype Mode 624

Creating your links 624

Testing your prototype 625

Chapter 2: Working with Artboards 627

Starting Your Document and Adding an Artboard 627

Creating New Artboards 628

Resizing an Artboard 629

Adding a New Artboard 629

Using the Layers Panel 630

Adding Objects to Your Artboards 631

Arranging Artboards in Your Pasteboard Area 632

Aligning and Distributing Your Artboards 632

Adding Scrolling Capability to an Artboard 633

Adding Guides to Your Artboard 635

Chapter 3: Creating Your User Interface (UI) with Shapes, Paths, and Custom Shapes 637

Working with the Basic Shapes 637

What’s included in XD 638

Determining the size 638

Using a Shape to Create a Button 639

Creating a border 640

Sampling a color using the eyedropper 641

Adding text to your button 641

Creating a gradient 642

Changing the Direction and Angle of Your Gradient 644

Using the Pen Tool 645

Editing shapes 646

Creating Custom Shapes 647

Adding lines 648

Importing from Illustrator 648

Chapter 4: Building Your UI 649

Layers and the Objects They Contain 649

Artboards and layers 650

What can you do with your artboards inside the Layers panel? 651

Transforming Objects 658

Aligning and Distributing 658

Be smart about your guides 658

Using the Align and Distribute feature 659

Chapter 5: Working with Text in Your XD Project 661

Using the Text Tool 661

Adjusting Text Properties 662

About readability and font selections 663

Selecting your font family 664

Saving Your Properties as an Asset 666

Using the Spellchecker 668

Importing Text 668

Using the Repeat Grid Feature 668

Importing updated images into your repeated grid 670

Updating your text in your repeated grid 671

Chapter 6: Working with Imagery in XD 673

Importing Artwork into Your Prototype 673

Working with Images in XD 674

Masking your images 675

Masking multiple objects 676

Importing Vector Images into XD 677

Exporting Selected Artwork from XD 678

Exporting multiple items 679

Exporting your artboards 680

Chapter 7: Creating Design Libraries 681

Saving Reusable Objects as Components 681

Making edits to your component 683

Unlinking a component 684

Saving colors in your libraries 684

Saving Character Styles 685

Discovering Libraries 686

Using shared libraries 687

Updating a published library 687

Editing a component 688

Taking Advantage of UI Kits 688

Chapter 8: Adding Interactivity to Your XD Project 691

Entering Prototype Mode 691

Discovering the many ways to link your artboards 693

Creating animations 696

Creating a Drag Trigger 698

Creating an Overlay 699

Adding States and Rollovers 701

Chapter 9: Sharing Your XD Project 705

Viewing Your App/Website on Your Desktop 705

Creating a Movie for Your User Story 707

Using the Device Preview Feature 707

Sharing Your XD File with Others 709

Sharing a specific user flow 709

Selecting a View setting 710

Adding collaborators to your XD document 713

Index 715

Supplemental Materials

What is included with this book?

The New copy of this book will include any supplemental materials advertised. Please check the title of the book to determine if it should include any access cards, study guides, lab manuals, CDs, etc.

The Used, Rental and eBook copies of this book are not guaranteed to include any supplemental materials. Typically, only the book itself is included. This is true even if the title states it includes any access cards, study guides, lab manuals, CDs, etc.

Rewards Program