did-you-know? rent-now

Amazon no longer offers textbook rentals. We do!

did-you-know? rent-now

Amazon no longer offers textbook rentals. We do!

We're the #1 textbook rental company. Let us show you why.

9780312202828

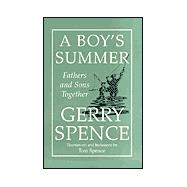
A Boy's Summer Fathers and Sons Together

by
  • ISBN13:

    9780312202828

  • ISBN10:

    0312202822

  • Format: Hardcover
  • Copyright: 2000-05-25
  • Publisher: St. Martin's Press
  • Purchase Benefits
  • Free Shipping Icon Free Shipping On Orders Over $35!
    Your order must be $35 or more to qualify for free economy shipping. Bulk sales, PO's, Marketplace items, eBooks and apparel do not qualify for this offer.
  • eCampus.com Logo Get Rewarded for Ordering Your Textbooks! Enroll Now
List Price: $19.95

Summary

"This book, then, is for boys and their fathers, fathers who want again to be boys and boys who want to grow up like their fathers."-Gerry SpenceGerry Spence, father to six, grandfather to ten, is a man who knows intimately the joys of fatherhood and who writes beautifully and lyrically about how fatherhood allows a man to rediscover the boy within himself, while simultaneously assuming true adult responsibility for the first time.This is a man who truly understands boys and how boys grow up to become men.No school teaches us how to become successful human beings; there are no classes to teach boys how to become decent adult men.Boys grow up by imitating their father-if, that is, the father spends enough time with his son.A Boy's Summer is a book of short essays describing activities, adventures and experiments that fathers and sons can do together.These projects take from an hour to an afternoon to a weekend-time that a father and son can spend together discovering themselves and the world around themIllustrated with forty-five line drawings by Tom Spence, A Boy's Summer is written so it can be read by father to son or by son to father."This book is for boys who, with their fathers, will share those precious moments that create the stuff of a lifetime from which successful sons, and because of it, successful fathers, are made."

Author Biography

Gerry Spence is the author of ten books, including How to Argue and Win Every Time, Give Me Liberty, and The Making of a Country Lawyer. Spence and his wife, Imaging, have six children of their own and ten grandchildren. He lives in Jackson, Wyoming.

Table of Contents

An Introduction for Fathers ix
An Introduction for Sons xv
How to Use This Book xix
Into the Wind---Making a Kite
1(7)
Walking on Stilts
8(4)
Making a Whistle
12(5)
How to Make an Argument---for a Pup (or Something Else?)
17(8)
Keeping a Summer Journal
25(4)
Finding a Hidden Treasure
29(5)
How to Make a Beanie
34(8)
David's Slingshot
42(5)
Hiding a Time Capsule
47(4)
Flying Without Even Trying
51(6)
Making a Summer Garden
57(9)
Our Friends the Grasshoppers
66(5)
Catching Butterflies and How to Keep Them by Setting Them Free
71(6)
Finding the North Star
77(4)
Making a Bow and Arrow
81(8)
Damming the Creek
89(4)
Kids on a Raft
93(7)
The Unexpected Trip
100(3)
The Cave Dwellers
103(8)
A Dandelion Necklace
111(6)
Searching for Tinder
117(5)
Making Fire the Indian Way
122(7)
Fire by Friction, the Caveman Way
129(6)
Weaving a Basket
135(7)
Building a Box Trap
142(6)
A Mouse in the House
148(6)
Fishing Side by Side with Dad
154(4)
Fishing with a Homemade Fly
158(8)
Rigging a Wild Fishing Pole
166(7)
Finding the Fish---Making a Bobber
173(6)
The Water-Drop Microscope
179(9)
Building a Tree House
188(7)
Becoming a Poet
195(7)
About the Authors 202(1)
Acknowledgments 203

Supplemental Materials

What is included with this book?

The New copy of this book will include any supplemental materials advertised. Please check the title of the book to determine if it should include any access cards, study guides, lab manuals, CDs, etc.

The Used, Rental and eBook copies of this book are not guaranteed to include any supplemental materials. Typically, only the book itself is included. This is true even if the title states it includes any access cards, study guides, lab manuals, CDs, etc.

Excerpts

1
Into the Wind—Making a Kite
SPRINGTIME, THE wind, a boy, his father and a kite all belong together. In the spring, the wind blows, sometimes as if to blow away the memories of winter. But so far as I can figure out, the wind in the spring is for only one purpose, and that’s for a boy and his father to fly a kite.
Boys and fathers have been flying kites since the day that string was invented. Some say a Greek scientist by the name of Archytas of Tarentum invented the kite five hundred years before Christ was born. But the ancient Chinese had been flying kites even before that. And every spring during all of those thousands of years the wind was blowing. And boys had fathers. So the point is that boys and fathers flying kites in the spring is part of being human. It’s in our genes, as it’s in the genes of fish to swim and birds to fly. Man himself has always wanted to fly, and before he invented flying machines, flying kites was about as close as he could come to it. So there’s no getting around it—you and your dad have to make a kite and fly it.
You can buy a kite, of course. In fact, you can buy some very fancy ones. Even when I was a boy you could go to the dime store and buy a kite. But they were usually flimsy or didn’t fly very well, and they cost something like twenty-five cents, and in those days that was a lot of money. They were never as good as the ones my dad and I used to make. Besides, who would want to buy a kite when you can make one? Making a kite is more than half the fun—thinking about how it’s going to fly and whether we’re as smart as the Greeks and the Chinese.
What materials and tools do we need to make this little flying machine? We need some sticks and some plain, two-foot-wide wrapping paper; some paste (Elmer’s glue will work); and some old cotton rags, perhaps from an old dress or apron. And, of course, a lot of kite string—the more you have, the higher you can fly the kite. For tools, we need a saw, a pocketknife to whittle the sticks and a pair of scissors. That’s all.
Now, about the sticks: Look around the house for some old boards or split firewood with straight grain. Fir is the best, but you could use other straight-grained wood. The wood you choose should be sawed to about thirty inches in length before you split off the sticks. Now split off three sticks. Make them about half an inch in diameter and whittle them nice and smooth. Two of the sticks will be about thirty inches long. The third stick will be about twenty-four inches. (They can be a little shorter or longer. Just keep the length of the sticks in proportion to each other, as shown in Tom’s drawing.)
About a quarter of an inch from both ends of each stick, make a very tiny notch all the way around—but not deep enough to weaken the stick. These notches will hold the framing string in place. Now cross the longer sticks to make an X as shown, with the top of the X smaller than the bottom. You don’t have to be a rocket scientist to do this. Just place the sticks to look as much like the drawing as possible. Next, take some kite string and bind these sticks together. Then place the shortest of the three sticks across the X as shown in the drawing, and bind that stick to the other two. This creates two more places to tie, which will make the kite frame strong.
You now have the frame together—it’s that easy. With string that is somewhat stronger than kite string (we used cotton grocery-store string), and starting at the right upper limb of the frame, tie the string to the notch and then stretch the string from one limb to the next, looping the string around the limb’s notch two or more times. Then go to the next limb, loop the string around the notch there, and so on until you have gone completely around the kite ending where you started. You can glue the string at the notches if you like. Now your kite frame is ready to paper.
Place the wrapping paper on the floor and lay the kite frame over it. Cut the paper about an inch wider than the out line of the kite. Then simply fold the paper back over the string, trim the paper where needed, and glue as shown in the drawing. Now you have it! The kite! The flying machine made by you. All we have to do is make the harnesses and pray for wind.
Let’s make the harness for the kite string. The easiest way to make this harness is to punch a small hole through the paper at the exact center of the crosspiece. Then, from the face of the kite, thread the string back through the hole and tie the string to the exact center of the crosspiece. Or you can make a string harness as shown in Tom’s drawing. What we are trying to do is create an angle of flight so that when the tail of the kite is attached (which holds the bottom of the kite down) the top of the kite is tipped forward against the pull of the kite string. When the wind hits the kite at this angle, the kite climbs as it tries to get away from the string to fly free with the wind—and in the trying, it continues to climb to the end of the string.
While we are dealing with the kite string, let’s unwind the kite string from the ball onto a stick about a foot long, winding the string diagonally back and forth on the stick. We can let out string faster from the stick than from the ball. Besides, we need several balls of string because we want to fly the kite high—oh, as high as we can until it’s hard to see it way up there.
Now let’s make the tail. Take a cotton rag (cut off all the hems first for easy tearing) and tear the cotton into strips two to three feet in length and a couple of inches wide. Tie the ends of the strips together until you have a tail five or six feet long. Now secure a loop of strong string between the two bottom limbs, as shown. Tie the tail in the center of this loop. Experiment with the tail length. The proper length depends upon how heavy the tail is compared to the strength of the wind and the weight of the kite. Assuming a fair wind, the kite will fly straighter and climb faster with a longer tail than a shorter one. If it fights too hard to get off the ground, shorten the tail. If, after the kite is in the air, it goes around and around in a crazy fashion, you don’t have enough tail to properly weight the kite so that it assumes the correct angle against the wind.
Let’s go fly this baby! Find a place without trees, power lines, or telephone poles or other obstructions—a large open park or a field. It is dangerous to fly a kite around power lines because the string could be damp and conduct a killer current down the string into your body. Besides, we don’t want our kite caught in the wires, because that would be the end of it. Goodbye kite. And good-bye a lot of good string. Never climb a pole to free your kite. Give it up and make another one.
Unwind about twenty or thirty feet of string. Have Dad hold the kite up, the face of the kite into the wind. The two of you may have to run together to get it up in the air if the wind is light. This is the time for you to judge the length of the tail. Nothing very hard about all of this. It will come naturally once you go out and do it and experiment a little. Benjamin Franklin used a kite with a key attached to the string and flew it in a lightning storm to demonstrate that the nature of lightning is electrical. Don’t do this! He could have been electrocuted if his string had been wet. What you and your dad want to do is just have fun. See the kite fly—no motor, no propellant except the wondrous spring wind. Only the lovely wind, a boy, his dad and a kite. What could be better? And remember, when someone in a sassy voice tells you, “Go fly a kite,” you can say, with great happiness, “OK.” Then run for your room where your kite is hanging on the wall.
G.S.

Rewards Program