did-you-know? rent-now

Amazon no longer offers textbook rentals. We do!

did-you-know? rent-now

Amazon no longer offers textbook rentals. We do!

We're the #1 textbook rental company. Let us show you why.

9781580085755

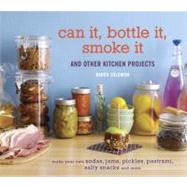
Can It, Bottle It, Smoke It : And Other Kitchen Projects

by ;
  • ISBN13:

    9781580085755

  • ISBN10:

    158008575X

  • Format: Hardcover
  • Copyright: 2011-07-05
  • Publisher: Random House Inc

Note: Supplemental materials are not guaranteed with Rental or Used book purchases.

Purchase Benefits

  • Free Shipping Icon Free Shipping On Orders Over $35!
    Your order must be $35 or more to qualify for free economy shipping. Bulk sales, PO's, Marketplace items, eBooks and apparel do not qualify for this offer.
  • eCampus.com Logo Get Rewarded for Ordering Your Textbooks! Enroll Now
List Price: $24.99 Save up to $6.25
  • Buy Used
    $18.74

    USUALLY SHIPS IN 2-4 BUSINESS DAYS

Supplemental Materials

What is included with this book?

Summary

The eagerly anticipated follow-up toJam It, Pickle It, Cure Itoffers more ideas for adventurous culinary DIYers to stock the larder with artisan food and drink, kitchen staples, tasty snacks, and gift-worthy eats. Want to make your own Plum Catsup (can it!), Strawberry Black Pepper Soda (bottle it!), and Chipotles in adobo (smoke it!)? Join food writer Karen Solomon in the culinary revolution that has changed the way people think about the boxed and jarred food on the grocery shelf, by trying these recipes and techniques for making homemade jams, relishes, pickles, bagels, popsicles, muesli, chips, pastrami, smoked nuts, sauces, syrups, and much more. Perfect for people who want to eat organic, local, and sustainable without giving up favorites like pretzels and sodas, this book will have weekend warriors whipping up mouthwatering foodstuffs for their pantries -and their friends-in no time.

Supplemental Materials

What is included with this book?

The New copy of this book will include any supplemental materials advertised. Please check the title of the book to determine if it should include any access cards, study guides, lab manuals, CDs, etc.

The Used, Rental and eBook copies of this book are not guaranteed to include any supplemental materials. Typically, only the book itself is included. This is true even if the title states it includes any access cards, study guides, lab manuals, CDs, etc.

Excerpts

Introduction

Call it punk domesticity, urban domestics, hipsters with Mason jars, or just a CAN-do attitude: a humongous tidal swell of interest in food preservation, home canning, foraging, nose-to-tail eating, and back-to-basics DIY kitchen wizardry has been growing in the past few years, and the movement has permanently shaped the way we think about store-bought and packaged foods of all sorts. Obsessive food eaters like you and me are demanding in earnest the same high-quality, artisanal standards from factory-prepared foods like cereals and sodas that we’ve sought out in our organic produce, hormone-free dairy, and grass-fed beef. In short, we’ve grown hungry as hell for real food, and we see no need to stomach mass market cookie-cutter food any longer. 

Home cooks have burned our palates on too much overbulked food packed with guar gum, dyes, and stabilizers. We’ve grown weary of characterless crackers, condiments, cereals, and other same-same packaged food solutions that continue to dominate the interior aisles of the grocery store. Who wants uniform factory-fake food that always tastes the same and looks the same?

We’ve come to expect more from what we eat, and we’re happy to inject a little sweat equity in our food—donning an apron, picking up a wooden spoon, and forging our own path to good eating and kitchen fun.

Making your own food is awesome. And, in point of pride, crafting your own pantry staples outshines the assembling of a single meal any day. Make chicken and rice and you can eat tonight. Make catsup and miso and you can enjoy the fruits of your labor for months.

When I wrote Jam It, Pickle It, Cure It, my first book on DIY cooking projects, I spent a year in the kitchen tinkering and experimenting to find the best and shortest routes to the kinds of handmade cooking projects that felt, at least to me, overlooked—lard, mustard, and marshmallows among them. My goals were simple: make a wide swath of the best project-y eats, using the least amount of effort and specialty gear, in my own urban apartment kitchen. I loved this notion of putting my own stamp on larder staples. I enjoyed writing Jam It so much, but I felt limited by a short production time, and I always felt just a few recipes short of finishing the kitchen manual that I’d always longed to own. 

Each recipe was like a stand-mixer-windstorm that blew open a dozen new pages of ideas for additional projects. Making frozen fruit pops made me want to try out alcohol-infused pops. Infusing oil naturally got me thinking about full-flavored vinegars. Making sausage steered my thoughts to the possibility of homemade hot dogs and, of course, to handcrafting the ever-present and necessary elongated bun. Was it possible to do all this at home adhering to these same principles? The only way to know for sure was to give it a go.

And once I started talking to other food-crafting enthusiasts in bookstores and online, I immediately started acquiring new material: family fixes and recipes and a grandmother’s archive of pantry staple ideas. One woman told me of her grandmother’s pickles fermented with a slice of rye bread floating on top. Another gave me her recipe for plum brandy, made with nothing but garden plums, sugar, and plenty of time. And I’d never had so many conversations about raising chickens in my backyard! I am thankful to everyone who shared with me all
of those great kitchen ideas.

I’m also thankful to all of you kooky cooks and bloggers who gave Jam It a try, and I sincerely hope that it led to some brainstorming at your own kitchen counter—that you, too, realized that you can do it better than the faceless food factory. I’m also thankful to Ten Speed Press for continuing to take a gamble on the culinary trials, errors, and successes of one dedicated, hard-working, heavy-researching food geek.

Yes, you CAN can. And dry. And ferment. And bottle. And bake. AND SMOKE. This book will give you a few more ways to do it all to the best of your ability. Enjoy, happy crafting, and keep pushing your food lust to the limits of kitchen science and your own palate’s creative genius.
 
Karen Solomon
CanItBottleItSmokeIt.com
 
 
1. Jam It
In the oeuvre of jam-making, we have the classics: strawberry, blueberry, grape, marmalade, and so on. And while these blue-chip jams are always crowd-pleasers, one should never get stuck in a fruity rut, but instead venture forth into new ingredients and new flavor combinations destined to become your new favorite spreads on bread. 

Head into the kitchen with your head held high. Cut your culinary chops on a carrot almond jam, stir up a classic apricot jam, channel your inner Spaniard with quince paste, and start dunking the entire contents of your refrigerator into addictive plum catsup. And the firm, sliceable fruit cheese here will also keep your dairy bin in action. 

Remember that good jam starts with good fruit: never use overripe fruit or anything not perfect enough to eat out of hand. March to the farmers’ market and scope out what’s good right now. Your jam pot awaits.
 

Carrot Almond Jam
Makes about 4 cups (2 pints)
 
TIME COMMITMENT About 2 hours
 
This jam is an extension of a failed recipe for Passover carrot candy from an ancient cookbook put out by a home for the aged in Worcester, Massachusetts. I’ve abandoned ship on making the candy, but this jam is an unusual and sweet treat unto itself. I also dig this one because all of the produce isn’t super seasonally dependent. Not only will this add veggie power to your breakfast toast, but it’s fah-bu-lous mixed with cream cheese as a frosting for carrot cake. If you can’t find tamari almonds, just roasted and salted ones will work.
 
11/2 pounds carrots, trimmed, peeled, and shredded (about 41/4 cups)
1 teaspoon grated fresh ginger
21/2 cups sugar
1/2 cup water
1/2 cup chopped tamari almonds
1 thin-skinned orange
1 lemon
 
INSTRUCTIONS Combine the carrots, ginger, sugar, and water in a large Dutch oven. In a food processor, grind the nuts and add them to the pot. Wash the orange and lemon and cut them into quarters. Chop them—seeds, skins, and all—in the food processor, and then stir them into the pot as well. 

Put the pot over medium heat, cover, and let it come to a boil. Stir, turn the heat to medium-low, cover again, and let simmer for 40 minutes, stirring occasionally, allowing the carrots to get tender.
 
HOW TO STORE IT Spoon the jam into clean jars and refrigerate for up to 3 months. Or spoon into sterilized canning jars, packing very tightly to eliminate the air bubbles inside (you can also stick a chopstick or long skewer into the jar to pop the bubbles before canning). Process for 15 minutes (review the canning instructions on page 28). This will keep for up to 1 year on the shelf. 
 

Apricot Orange Jam
Makes about 7 cups (31/2 pints)

TIME COMMITMENT About 1 1/2 hours
 
A little citrus can go a long way in jam-making—it both brightens sweet fruit flavors and helps thicken fruit-and-sugar mixtures. This lovely summer jam is not overly sweet, and it shows off the apricots’ best attributes. Use thick-skinned oranges like navels or Valencias.
 
21/2 pounds apricots, pitted and sliced lengthwise
1 cup minced orange peel (from about 2 large oranges)
4 cups sugar
Juice of one lemon
3 cups Apple Pectin (page 12)
 
INSTRUCTIONS Place a small plate in the freezer.

Combine the apricots, orange peel, sugar, and lemon juice in a large Dutch oven and let macerate for at least 1 hour to extract the juice from the fruit. 

Cover the pot and bring the fruit mixture to a rapid boil over medium-high heat. Remove the cover and stir often for 5 minutes, to keep the temperature even and keep the fruit from sticking to the bottom. Turn off the heat and, once the bubbling has stopped, stir in the pectin to combine. Test a teaspoonful of the jam on the chilled plate. After 30 seconds, the jam should be viscous and streak slowly when the plate is tilted.
 
HOW TO STORE IT Pour the jam into clean glass jars and refrigerate for up to 4 months. Or pour it into sterile canning jars and process for 15 minutes (review the canning instructions on page 28). This will keep for up to 1 year on the shelf. 
 

Quince Paste
Makes about 6 ounces
 
TIME COMMITMENT About 1 1/2 hours
 
Quince are fall and winter fruit and they’re very high in pectin, making them a dream for jams and jellies. This preparation is called a paste, but it’s really sort of an adult fruit chew just born to sit alongside Manchego cheese and Marcona almonds. Don’t let the week-long preparation time deter you; most of that is just curing time.
 
3/4 pound quince, peeled, cored, and cut into 1-inch cubes
2/3 cup sugar
2/3 cup water
1/4 teaspoon kosher salt
1/4 cup fresh lemon juice (from about 2 lemons)
 
INSTRUCTIONS Line a small rectangular baking dish (about 6 by 4 inches) with parchment paper, and lightly oil the paper with a neutral vegetable oil.

Combine the quince, sugar, water, and salt in a medium saucepan. Cover, and bring to a boil over medium-high heat. Reduce heat to a simmer and stir occasionally for 20 to 25 minutes, until the fruit completely breaks down and the mixture turns a dark, caramel color. Draw a spoon across the bottom of the pot; the mixture should streak and hold its shape before flowing together again. Mash the mixture with the back of a spoon or with a potato masher (or carefully spoon it into a food processor and puree it for a totally smooth consistency). Stir in the lemon juice. Pour the hot paste into the paper-lined dish and let it set at room temperature for 4 days. Lift the paste out of the dish with the paper and invert onto a flat surface covered with oil-lined parchment paper; let it cure for an additional 3 days at room temperature, uncovered. The dried and cured paste should be firm throughout and slightly tacky on the outside.

Using a knife or a bench scraper, trim the edges of the paste to make them even and attractive (that is, if you like your food even and attractive).
 
HOW TO STORE IT Wrap the paste tightly in wax paper and store in the refrigerator for up to 1 year.
 
 
Plum Catsup
Makes about 4 cups
 
TIME COMMITMENT About 1 1/2 hours
 
Where does one draw the line between a catsup and a sauce? My personal definition is that if I want to dunk French fries in it, it’s a catsup. This hot little number is way more versatile than your standard bottled tomato catsup. It’s tangy, sweet, severely savory—killer on a chicken sandwich or with pork loin. Find a friend with a plum tree (thanks, Tom!) and you will have plums a-plenty to get this in gear.
 
5 pounds black or red plums, preferably Santa Rosas
2 cups water
11/3 cups sugar
2/3 cup plus 2 tablespoons apple cider vinegar
6 tablespoons orange marmalade
1 large cinnamon stick
2 star anise
2 whole cloves garlic, peeled and lightly scored
with the tip of a knife
4 teaspoons kosher salt
 
INSTRUCTIONS Wash and stem the plums and lay them in a single layer in the bottom of a large Dutch oven. Add the water. Cover and bring to a boil over high heat. Reduce the heat and simmer for 30 minutes, stirring occasionally to prevent the fruit from sticking to the pot. The skins will burst and the plums will release their juice and soften.

Remove the pot from the heat, uncover it, and let the fruit cool for about 5 minutes. Pour the plums into a heavy-duty sieve, a small-holed colander, or a food mill set over a large mixing bowl and push the plums through to render the juice and the pulp and to separate out the skins and the pits. Discard the skins and pits. Return the juice and the pulp to the pot and add the sugar, vinegar, marmalade, cinnamon, star anise, garlic, and salt. 

Set the pot over high heat and bring it just to a boil. Lower the heat and simmer the mixture, uncovered, to reduce it, being careful not to let it splatter. Stir often, modifying the heat as needed to keep it at a slow simmer as the liquid reduces. Cook for about 35 minutes, until the mixture has thickened. Draw a spoon across the bottom of the pot; the mixture should be thick enough to part, expose the bottom of the pot, and then come back together again. Remove and discard the cinnamon, anise, and garlic. Pour the catsup into glass jars or bottles.
    
HOW TO STORE IT Kept refrigerated, this catsup will keep for up to 1 year. It can be served warm or cold.
 
 
Apple Cranberry Fruit Cheese
Makes about 11 ounces
 
TIME COMMITMENT 2 to 3 days
 
Where does a fruit paste begin and a fruit cheese end? On the culinary map, I believe it’s somewhere around the intersection of Yum and Awesome. Fruit cheese tastes like fruit but slices like cheese, and it comes complete with a surprisingly creamy texture. It’s beautiful, and in addition to tasting swell on its own, it turns any humble plate of Cheddar cheese and crackers into a rather swanky hors d’oeuvre.
 
11/2 pounds sweet apples, peeled, cored, and cut into 1-inch cubes (about 4 cups)
1/3 cup dried cranberries
1/2 cup water
3/4 cup sugar
1/4 teaspoon kosher salt
 
INSTRUCTIONS Combine all the ingredients in a large saucepan, cover, and bring to a boil over high heat. Reduce the heat and simmer for 20 to 25 minutes, until the fruit is very tender. Reduce the heat to low, uncover, and mash with the back of a spoon or a potato masher. Allow the fruit to thicken and slowly reduce for about 1 hour, until the mixture darkens, mashing and stirring frequently to keep it from burning or sticking. The mixture will be thick enough to part and expose the bottom of the pot before slowly coming together again.

While the fruit is cooking, line a loaf pan with a sheet of parchment paper long enough that an inch or two hangs over each long side. Lightly oil the paper with vegetable oil and pour the fruit mixture into the lined pan, smoothing it out evenly with a spoon or spatula. It will be about 3/8 inch thick. Refrigerate, uncovered, for 24 hours.                     

Take the fruit cheese out of the refrigerator. Grasping the paper, lift it from the pan and transfer it to a rack on top of a baking sheet. The cheese should retain its shape. If it doesn’t, return it to the pan and refrigerate for another day before moving forward.

Turn on the oven to its lowest setting and place the fruit cheese—paper, rack, and all—in the oven. Dry the fruit cheese in the oven for 3 hours, with a wooden spoon propping open the oven door to let moisture escape. The cheese should feel dry on top when it’s done. If it’s not, return it to the oven for another hour. Allow the fruit cheese to sit at room temperature for 1 day. The next day, lay a clean piece of parchment paper on the rack and invert the cheese onto the new paper, so that its bottom side is facing up. Put the cheese—rack, paper, and all—back into a low oven for 3 hours. The cheese has cured when the surface feels dry to the touch (but don’t worry if it’s still quite moist in the middle).
    
HOW TO STORE IT Once it’s cooled completely, wrap the cheese tightly in wax paper and store it in the dairy drawer of the refrigerator. It will keep (and, in fact, improve), when stored well-wrapped, for 6 months.

Rewards Program