did-you-know? rent-now

Amazon no longer offers textbook rentals. We do!

did-you-know? rent-now

Amazon no longer offers textbook rentals. We do!

We're the #1 textbook rental company. Let us show you why.

9780345485434

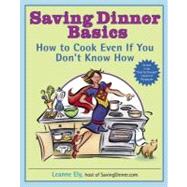
Saving Dinner Basics How to Cook Even If You Don't Know How: A Cookbook

by
  • ISBN13:

    9780345485434

  • ISBN10:

    0345485432

  • Format: Paperback
  • Copyright: 2006-08-22
  • Publisher: Ballantine Books
  • Purchase Benefits
  • Free Shipping Icon Free Shipping On Orders Over $35!
    Your order must be $35 or more to qualify for free economy shipping. Bulk sales, PO's, Marketplace items, eBooks and apparel do not qualify for this offer.
  • eCampus.com Logo Get Rewarded for Ordering Your Textbooks! Enroll Now
List Price: $17.00 Save up to $0.51
  • Buy New
    $16.49

    USUALLY SHIPS IN 3-5 BUSINESS DAYS

Supplemental Materials

What is included with this book?

Summary

Cooking 101 If you think that folding an egg has something to do with laundry, or that a wok is good exercise, you've come to the right place. Nutritionist and family meal-planner extraordinaire, Leanne Ely knows her way around a stove and a pantryand she provides everything you need to know, from mincing garlic and barbecuing beef to pulling off your first dinner party. Select chapters feature tasty recipes that can be prepared with the greatest of ease. You'll find practical and trustworthy advice on equipping your kitchen: what you must have, what you don't need stocking your cupboards, fridge, and freezer with the essentials selecting fresh produce and high-quality meats, poultry, and fish slicing, dicing, sauteing, simmering, and other prep techniques whipping up quick, scrumptious dishes with ingredients on hand ensuring that your main course and side dishes are ready at the same time preparing mouthwatering one-pot meals, from Lemon Tarragon Chicken to Easily the Best Casserole in the World baking fast and easy cookies, pies, cakes, and cobblers Saving Dinner Basics also includes a handy glossary of common food terminology, a spice primer (it's about time you discovered thyme!), and a troubleshooting guide for various cooking challenges. Let Leanne Ely help you turn your kitchen into what it was meant to be: the place where great meals begin. Leanne Ely is considered the expert on family cooking and healthy eating. She is a syndicated newspaper columnist (The Dinner Diva), a certified nutritionist, and the host of SavingDinner.com. Leanne has a weekly "Food for Thought" column on the ever-popular FlyLady.net website, as well as her own e-zine, Healthy Foods. She is the author of Saving Dinner, Saving Dinner the Low-Carb Way and Saving Dinner for the Holidays. She lives in North Carolina with her two teenage children. "Anyone who finds cooking a mystery needs Saving Dinner Basics." Marla Cilley, The FlyLady, author of Sink Reflections

Author Biography

Leanne Ely is a certified nutritionist and the host of SavingDinner.com. Her syndicated column, The Dinner Diva, appears in 250 newspapers nationwide. She writes a popular Food for Thought column on FlyLady.net and hosts The Dinner Diva radio show on Blog Talk Radio. Ely also writes her own e-zine, Healthy Foods, and is the author of several books, including the recent Body Clutter, which was a New York Times bestseller. She lives in North Carolina with her two teenage children.

Supplemental Materials

What is included with this book?

The New copy of this book will include any supplemental materials advertised. Please check the title of the book to determine if it should include any access cards, study guides, lab manuals, CDs, etc.

The Used, Rental and eBook copies of this book are not guaranteed to include any supplemental materials. Typically, only the book itself is included. This is true even if the title states it includes any access cards, study guides, lab manuals, CDs, etc.

Excerpts

CHAPTER ONE

EQUIPPING THE KITCHEN: TOOLS OF THE TRADE
It seems like the world is obsessed with the gizmos and gadgets that illustrate a cutting-edge kitchen, rather than interested in the more utilitarian (and admittedly less snazzy) kitchen that gets plenty of use. I remember years ago when I was catering that one of my clients had this amazing kitchen—a six-burner Wolf range, a fabulous Sub-Zero fridge, and all the latest and greatest tools a person could lust for. And yet, this poor woman would have to call her mother to figure out how to boil a pot of water. She was totally hopeless in the kitchen. She looked great, her kitchen looked great, but the bottom line? She was a wannabe cook and couldn’t find her way around that kitchen, even with an illustrated map.

Most people don’t want to live out their culinary lives with kitchen “sets”—they really want to cook and make things happen in the kitchen, like breakfast, lunch, and dinner and an occasional dessert, too. To get there, you’re going to need to make sure your kitchen is ready for real-life action, and not a photo shoot for a magazine. That means you are going to need tools and equipment, not gizmos and gadgets—there’s a big difference.

So let’s get to it, shall we? Get your kitchen tricked out with what you need, and leave the junk behind. I have lots of suggestions here: equipment and such that is essential, and a good description of how to set up your own kitchen. Once you’re really cooking (preferably with gas), then you can add some more goodies to your basic setup. You’ll figure out what you want to add as you go along—that’s how your kitchen reflects your own unique cooking personality. Maybe you’ve taken pasta making to a new level; it is completely appropriate for you to buy a pasta machine so you can make your own. This is what I mean by having kitchen tools and appliances that reflect your own unique cooking style. Just be careful! I’ve never met a kitchen store I didn’t find irresistible. It’s easy to fall madly in love with an expensive gadget and promise yourself that you will soon be making homemade ice cream or pasta. Inexpensive gadgets are much easier to justify (hey, it’s only five bucks), but these one-trick items can crowd your drawers and cupboards and make the essential necessary tools hard to find when you need them. Being discerning has saved me from chucking expensive (and inexpensive) nonessential equipment to the Goodwill.

If cooking is something you are still reticent about, let me appeal to your inner nurturer. Cooking is a soul-satisfying activity. Cooking a meal provides food and nurturing to those you love most in the world. Providing food and sustenance for your family (and doing it in a tasty and fun way) is a gratifying daily job that is more a joy than a drudgery—if you have the eyes to look at it that way. It starts with having the right tools, getting your pantry stocked, and then actually doing something in the kitchen with those tools and foods.

Cooking with Gas, Literally

If you are fortunate enough to have a choice of what you’ll be cooking on (gas or electric), you’ll definitely want gas. Gas gives you better control of the heat; a gas stove heats almost instantaneously, cools down quickly, and is the first choice of professional chefs. Electric stovetops seem to do the exact opposite and frustrate pros and novices alike.

But what do you do if you’re stuck with electric? Here are some tips for coping:

1. Make sure the burner elements are working properly. They sometimes need replacing, so make sure yours are in top working mode.

2. Match the size of the pan to the element. Not only is it wasteful energy-wise to put an 8-inch pan on a 10-inch burner, but it also could produce a scorching result, not to mention the chance of burning yourself.

3. Keep the burners clean. When an electric stovetop is clean, it reflects the heat better and saves energy as well.

4. Flat-bottomed pans are the key to even cooking. The element must have full contact with the pan in order to produce decent results.

5. Turn the heat off way before the cooking time indicates, especially if you need to take it down from a rolling boil to a simmer. This will help you simmer your food without burning, because electric coils take longer to cool down than gas flames.

I want to start this section with a letter I received from a perplexed reader asking for some direction and help in setting up her kitchen. This letter will help you get a good visual on how to set up your own kitchen:

Dear Dinner Diva,

I have a new apartment and don’t know exactly how to set up my kitchen—where do I put everything? Where should everything go? I have plenty of below- and above-cupboard space—and a few drawers. I have a big stash of vitamins, too, that I don’t know what to do with.

I’ve gotten rid of my fast-food habit by cooking at home (and make my own fast-food by chopping everything up in advance so all I have to do is put it together when I want something to eat), but the kitchen isn’t efficient. Do you have any ideas on how I can do this?

Thanks in advance for any help,

Distraught in Detroit

Dear Distraught,

First off, I want to commend you for getting your act together by getting rid of the fast-food habit. Your “assembly-line” approach to doing your own, homemade fast-food is an inspiration, good for you! One word of caution is not to get too far ahead. By day four, your stuff is going to start looking pretty rank. You want to chop and store just enough for a couple of days, ideally.

You asked a great question that bewilders many a newbie with a first kitchen: where does everything go? On one hand, that’s difficult to say without seeing your kitchen; but on the other hand, there are some logical ways to discuss this without ever having to see it. You mentioned that you have plenty of below- and above-cupboard space. So let’s start there and see what we can do.

I like to put like with like. In other words, keep the baking stuff together, the pots and pans together, and the utensils together. Seems real basic, but you can’t imagine some of the kitchens I have worked in. They just didn’t make sense.

If you have a small bank of drawers, put your silverware in a plastic silverware tray with the different compartments for each utensil (very cheap at a discount store), and put that in the top drawer. You may want another plastic utility tray in the same drawer (if it will fit) for holding your serving utensils.

You can buy these plastic trays in two sizes—narrow or wide. They help keep things sorted rather than your having to dig through a drawer—really smart for keeping you from getting cut, too, because knives should never be thrown into a drawer without being contained and controlled in some fashion (in my opinion). This is what I’ve done with all my kitchen drawers. Use another drawer for other miscellaneous utensils like a potato peeler, a grater, can opener, etc. Again, use utility trays if you can.

I use another drawer for plastic wrap, foil (heavy-duty for roasting and regular), plastic bags (zipper type, all sizes, and freezer and regular weights), waxed paper, parchment paper (great for those who bake and those who don’t—parchment is a multitasking paper), and my rolling pin, believe it or not. Great place for it. I also have a drawer for just my towels and dishrags. I buy them in bulk from a restaurant-supply store, so I have white muslin towels and bar rags like you see in restaurants. They wear very well; when they are ugly I use them as rags, and when they wear out I dump them.

Choose a cupboard for your food pantry (unless, of course, you have a proper pantry). I put the canned stuff all on one shelf and again: like goes with like. If you have four cans of tuna, place them all together. Stack them even. Don’t have them scattered throughout the cupboard or you won’t know where anything is, especially when you need it. I do the same with dried goods, keeping the pastas together, as well as rice, oatmeal, and cereals. I also use small plastic baskets for envelopes of spice blends, bags of dried beans, and other miscellaneous and sundry items needing a place to live in my pantry that wouldn’t do well sitting by their lonesome on a shelf.

On the bottom shelf of my pantry, I keep a bin for onions and another one for potatoes and sweet potatoes. Are you seeing the pattern? It makes good sense because all things are complementary to one another.

When it comes to the actual dishes and serving pieces, keep in mind that your dishware should be close to the silverware for easy table setting. I keep my mugs and glasses in one cupboard right above the coffeemaker: glasses on one shelf, mugs on another. Everyone knows that if you need something to hold a drink, you go to that particular cupboard. When I make my coffee in the morning, the cups are right where they should be—on the first shelf in the cupboard above the coffeemaker. The whole ebb and flow of the kitchen is to have it make sense. When it is set up that way, it will be easier to work in when you need to grab something in the middle of cooking or serving.

You mentioned that you have a lot of vitamins. So do I. The way I handle keeping them from being all over the place is to place them all together in a large basket. I use baskets for everything. They contain everything beautifully, and when it’s time to take your vitamins, you just pull the basket (or baskets) out, get your vitamins, put them back in the basket, and voilà! Easy as pie!

In my old house, I had my spices in a spice rack that I hung on the wall right above the stove. That is one option for anyone who likes the convenience of having spices handy while cooking (however, they will age a lot faster by being right above the heat). In my new house, I use a drawer and cupboard right next to the stove. Either one works—it just depends on your setup. The spices I keep in a drawer are the little half-size jars. On each lid top, I mark what it is with a Sharpie (abbreviated, of course). That way, when I need to grab a spice in a hurry when I’m cooking, I don’t have to stop and try to figure out which one I need. I keep frequently used cooking utensils on the stovetop (like big spoons, wooden spoons, spatulas, wire whisks, etc.) in a big crock. I find it helpful and easy to get something I need right away.

That’s it in a nutshell. I sincerely hope that helped!

Best Wishes,

The Dinner Diva

Your Basic Basic Kitchen

Now that you understand where to put things, you need to know what to get so you can put them where they need to go. Did you get all that? Well, never mind, then. Just keep reading. . . .

Knives

Sharp, high-quality knives are first on the list. This is one place you cannot afford to skimp. Buy a good brand (I’ve used Henckels for more than 20 years now) and you’ll have them for your entire cooking career.

First up on the list is a basic cutting and chopping knife. A 6- to 8-inch chef knife (or the same-sized santoku knife, which is a Japanese knife used for the same chopping abilities) is the ticket. Don’t be intimidated by this large a knife. Once you learn how to hold it and chop with it (don’t worry, I will teach you how!), you won’t believe you could ever cook without one!

Next is the paring knife. Again, we’re talking quality here—no cheapie, 99-cent plastic-handled number you picked up at the dollar store. In a pinch, on your way to a picnic, maybe—but you can’t use a knife like that every day in the kitchen or, I promise, you will end up hating to cook. Quality tools do make a major difference. Paring knives have smaller blades, 21?2 to 3 inches long. This is the knife you will use to peel or pare an apple and trim the ends off radishes or Brussels sprouts.

Serrated knives will help you slice a tomato like a pro, cut bread into slices, and cut up citrus with ease. The toothy blade makes all the difference. My preference is a larger and a smaller serrated knife (one of each)—the larger knife for bread, the smaller one for the citrus and tomato slicing.

You can’t have Thanksgiving (or any other holiday requiring a slicing up of the holiday fowl or beast) without a large carving knife and fork. The blade on these knives is typically long and flexible, enabling you to negotiate corners and carve neatly. If you can, purchase the carving knife and fork set together. I have the same lovely set I received as a gift more than 20 years ago, and they work just as wonderfully now as they did all those years ago when I struggled to carve my first Thanksgiving turkey.

Two other knives you probably won’t need are a boning knife and a filleting knife. And guess what you’ll do with these knives? Bone and fillet! Now, let me tell you how often I use my boning and filleting knives. About once a year, if that. The bottom line is, if I need something boned or filleted, I have my butcher take care of it for me. Why? Is it because I don’t know how to do it or because I’m lazy? The answer is yes to both. I can painstakingly bone a chicken breast or another piece of meat, and I can fillet, too. But not well. This is why we ask the butcher to do it. This is what he does for a living and you don’t. Besides, you have other things to do besides boning and filleting poultry or other meat, don’t you? I’m glad we discussed this. So for the sake of having a full set of knives, make sure you have your boning and filleting knives. We’ll all sleep better at night knowing you have a complete set.

Blade Runner

If you notice your knives beginning to dull (and they will naturally from use), you will want to sharpen them. One thing I don’t recommend is buying anything that has you consigning your blades to a “knife sharpener.” Don’t do it. Your knives will suffer and you will regret it. These sharpeners, no matter how tricked out or expensive, can’t offer the same control you can. You need only two things to get your knives in shape.

The first one is a steel. Generally, this will come with your knife set (if you bought it that way); otherwise you will need to buy one. It’s long, has a handle, and looks like a sword—somewhat. Mine has a little ring attached to the handle so that it can be hung up for easy use in the kitchen. If you’re a professional, hanging up your steel is always an option—mine stays put in the wood block it came in.

Anyway, to sharpen a knife you need to hold the knife with the hand you would normally cut with. In the opposing hand, you will want to grip your steel, upright like a flagpole. Holding the knife at a 25-degree angle (or thereabouts), move the blade down one side of the steel, making sure to get the whole knife moving. Now do the other side of the knife. You can do this a few times, but make sure to do both sides evenly. I always count when I do mine.

Using a steel is more of a maintenance thing than a sharpening thing, really. If your blades are in dire need of a good sharpening, you’d be wise to take them to get professionally sharpened. Ask for a referral at a quality kitchenware shop or see if this is a service it offers. You can also check the phone book or check online for somewhere close by where you can get your blades handled, but make sure you get them sharpened professionally at least once a year.

So now you’re asking me how to use that santoku or French knife—the big one. Okay, believe it or not, this is easy. First you will need to use both hands—one for holding whatever it is that you’re cutting (that will be the opposite hand you will be cutting with) and the other to cut with. The hand that holds the food we will temporarily transform into a claw. Yes, a claw. Why a claw? Glad you asked. Because when you are holding the food in a clawlike fashion, if your knife accidentally gets too close to your fingers, the worst that will happen is that your fingers will get too close a shave, but you won’t be losing any digits to the santoku!

Now, as far as making the chopping go smoothly and quickly like they do on Food TV, well, that just requires a rhythm, which will come as you get better at chopping. The idea is to “rock” the blade slightly as you chop. This will build a rhythm and eventually your speed. Next time you’re watching the Food Network, pay attention as Emeril chops effortlessly. He’s got his claw going; he’s a-rockin’ and a-choppin’—the whole thing is an art form. Remember, though, that you’re not Emeril. Go easy and slow, and be careful. These are sharp knives we’re working with here, not rubber spatulas.

After you have your knives in order, there are few more objects to get your basic kitchen stocked—some stuff you’ll already have, some stuff you wouldn’t have thought about:

• Several cutting boards. Working with just one cutting board is a mistake. With all the scary information out there on salmonella and the rest of the creepy germs that can sneak into your food, it might not be a bad idea to be a little more kosher about your cutting boards: use one for vegetables, fruit, etc., and one only for meat, poultry, and fish. It’s a lot cleaner. You can buy these hard plastic cutting boards in various sizes (and colors so you can color-code—green is for veggies, blue is for meat, etc.) for next to nothing at discount stores. They wear out, too, you know, and the cutting lines you carve into your boards can harbor all kinds of icky bacteria. You will want to replace them as they start getting a little “hairy” in the cutting area.

• A flat-bottomed wok. This is a tool I have owned for a very long time. This stainless, well-seasoned pan has cooked more stir-frys than a Chinese take-out. This wonderful pan can cook for two or do veggies for a whole crowd. I truly wouldn’t be without it. The flat bottom is an essential feature to the wok—no fussing with a ring and a wobbly pan on the stove. It makes a huge dif- ference in whether you will love or hate this particular pan and whether or not it will be used often. Having a flat bottom may not fit well in a pair of jeans, but for a wok, a flat bottom is a per- fect fit.

• Vegetable steamer. Unless you forget about your vegetables in the steamer and steam the daylights out of them, you almost can’t wreck them. The vegetable steamer helps to save the nutrients in the veggies, too, rather than have them boil out into the water. The steamer is a little stainless-steel number that blooms open like a flower when you’re using it and then retracts to a nice little round bun-looking thing when you’re not using it. It’s a great, inexpensive tool that belongs in every kitchen.

• Stainless or nonaluminum cookware. Aluminum has been linked to all kinds of health problems, and rather than debate the issue, why not just get some decent stainless-steel pots and pans and forget about it? My faves are the Calphalon stainless-steel ones (Calphalon skillets I especially like), but there are other brands to be had. I bought a terrific set (Italian-made) at Costco that had all the aforementioned criteria—top-grade stainless-steel pots and pans with heavy bottoms so the food doesn’t burn easily, well-built handles (plus a secondary handle on the other side of the larger pans for easy handling), and pots and pans that clean up easily (no odd nooks and crannies or weird angles—you can tell by the basic construction if it will clean up well). Make sure, too, that the entire pan is made of stainless-steel—no goofy plastic handles that will melt if your recipe calls for sticking the skillet under the broiler to melt some cheese or something. The deal is to not get hung up on name brands but to look for the clues to real quality. I have no idea who made my pots and pans, but it’s a private label and I bet it is a top-notch manufacturer.

What about nonstick coated pans, you ask? Well, read on and you’ll find out that I do own one. I think a set of nonstick cookware is a mistake; however, a nonstick skillet is pretty much essential.

• A stash of 9 3 13–inch baking dishes. You can fill and throw these in your freezer. If you can get in the habit of doubling your family’s dinner, you can stock a mother lode of meals in the freezer with very little extra effort. I am partial to the Pyrex brand because of the durability factor. In fact, I’ve been a Pyrex fan for years and years, and occasionally I need to buy more—not because they’re broken or worn out, but because I bring something in them to a party and forget where I left the dish!

• A timer! If you are like me, your good intentions can turn into burnt offerings. A good working timer with a buzzer or a bell you can actually hear in the laundry room with the washer and dryer going full speed ahead is really smart. Why go to all the trouble of cooking if you can’t get the lasagna out of the oven before it’s Italian history? Trust me, you need a timer!

• Wire whisks. Make sure they are quality wire whisks, too, not the cheapie kind. I have three in various sizes: a huge balloon whisk for the big jobs, a medium one (this one does most of the work around here), and a smallish one for the little jobs, like eggs or a quick sauce. I also have a plastic-coated whisk that I use in my large nonstick Calphalon skillet. There is nothing better than a good whisk for making scrambled eggs (or prepping eggs for a recipe), making sauces, gravies, etc. A wire whisk is an unbeatable, necessary, have-to-have tool. Keep several on hand.

• A good stash of wooden spoons. My friend Sharon brought me back a wooden spoon from France that I am just in love with. The engineering of the spoon is perfect for stirring anything, and it just feels good in my hand. I have only one in my crock of stirring implements, but it’s the first one I grab if it’s not dirty. My goal is to get more of those lovely spoons in different sizes.

• Kitchen linens. As for me and my house, we use stuff from the restaurant-supply store. I’m not kidding. I loathe the matchy-matchy stuff from department stores. I especially hate oven mitts and consider them nearly useless. I do use one little handwoven one that my daughter made me when she was eight years old, but other than that, I use clean terry towels or white muslin towels the way they do in professional kitchens. You learn how to use them to pick stuff up in a hurry—trust me on that one. If you insist on using oven mitts, get some that are thick enough on the bottom but flexible on the top so you don’t feel like your arms are stuck in a robotic stance.

• Microwave, but only for quick heatups, like melted butter or zapping a leftover. I am still not sold on this idea of microwave cooking. Yeah, I know microwaves have come a long way, baby. But in my book, it’s still just an appliance for helping you cook, not for doing the actual cooking. It’s not that it’s cheating, necessarily (and believe me, I cheat and take shortcuts all day long with my cooking), but it’s that they cook weirdly. I’m not convinced that rearranging the food’s molecules through zapping is the best way to cook.

• Pizza stone. (Good-bye, pizza parlors!) You will be sold on how wonderful this thing is. I use mine for heating rolls and making garlic bread, too. A girlfriend of mine uses hers for cookies as well.

• Kitchen scissors. You can cut up chickens easily, snip herbs, cut dough for cinnamon rolls—you can even stick your scissors into a can of gloppy tomatoes (although that kind of grosses me out, to be honest) and snip away to get chopped tomatoes. Truly an indispensable tool and, again, something you can pick up at a discount store. I have had expensive kitchen scissors and cheap ones, and although the expensive ones are little nicer, for what you’re using them for the inexpensive ones are just fine. (Buy a second pair and stash them for emergencies. I guarantee a child will abscond with the primary pair at some point).

• Dry measuring scoops. I recommend at least two sets. You can get very nice stainless-steel scoop sets at discount stores. I put a 1-cup measuring cup in my flour canister and a 1?2-cup measuring cup in my sugar canister. My brown sugar canister has a 1?4-cup measuring cup in it. True, I often need a different measurement, but sometimes it’s just the amount I need; if it’s not, the other set of measuring cups is sitting in a drawer, ready for action. This works well and it’s one less thing to think about when you’re trying to measure something for a recipe. Always use the back of a knife to scrape off the top for an accurate measure. When measuring flour, you will want to spoon it into your measuring cup, and then use the knife to scrape off the top. If you scoop the flour using the measuring cup, you might measure a tad too much and wreck your recipe.

• A good supply of zipper-type bags. All sizes and the freezer kind, too. Yes, they are worth the extra money—your freezer stuff will really hold up better. They’re great for marinades, storing doughs, soups, a big ol’ meatloaf, frozen veggies (once you’ve opened the original bag), and a whole host of other foodstuffs, too. One must-have tool is a Sharpie pen. Hide it in the plastic wrap so no one walks off with it. Then you can even mark the contents and date on your bags! What a concept—to actually know what’s in your freezer and how old it is! How completely organized can you get?

• A good stash of plastic storage containers. Not everything fits well in a zipper-type bag, so those little plastic storage containers are just the trick. I buy the “disposable” ones at the grocery store rather than invest hard-earned money in ones that need to be handwashed (as if!) and cost a day’s wage to own. Not only that, but when you consider how often you need to purge your plastic container storage drawer (or cupboard) because of the mismatches (tops and bottoms), you would be wise to take my advice— especially if they are on sale and you have a coupon!

CHAPTER TWO

A PANTRY PRIMER In this day and age, a pantry is more than a mere closet in which to store dry goods and canned items. When I think pantry, I think about the fridge and freezer, too. After all, this large item also does a good job keeping food handy. Shelf life isn’t as long, but it’s an important tool for the cooking and making of meals.

Before you can properly stock a pantry, you need to destock it and make sure it’s ready to hold the stuff you want in there. This goes for the fridge and freezer, too.

You know what I’m talking about when I say you have to destock first. Just like a bookshelf can be bursting with books, making the contents nearly unusable, so can a pantry be bulging with so much stuff that it turns your most important dinner- (and other meal-) producing asset into a landfill. I am going to bet you have stuff sitting on those shelves that you will never eat in a million years. There are probably boxes of half-eaten cereal, bought on sale (with a coupon) that the kids gave the big thumbs-down to, and they’ve been sitting there taking up precious space for well over six months: canned veggies missing the label, the old dented cans in the back of the cupboard, and the hearts of palm or other gourmet goodies that you have no idea why you bought it in the first place. There could be expired stuff hanging out in your pantry, too. This stuff must go! Anything decent and still edible can be taken to a food bank, but the rest must simply go in the trash. If you do this one simple exercise, you will experience the thrill of getting your pantry logically arranged and ready to work for you. Don’t brush this off—this has to be the starting place. For me, my neat and spiffy pantry brings a sense of calm because I can navigate through my cooking duties knowing what is (and what isn’t) there.

Here’s how this works: grab a trash bag and a sturdy cardboard box—you will use the bag for the trash and the box for the food bank. Organize your pantry by putting like items together: all your baking supplies together in one spot, all your canned goods, all your cereals—you get the picture. When grouping the canned goods, you will want to put the tomato products together, the chicken broth, etc., together—not just toss the canned stuff all together or you won’t be able to accurately inventory what you have. Soon the pleasure of a pleasing pantry will begin to emerge. You will be able to make sense out of the thing, and before you know it, the end result of your labor will be a Perpetual Pantry that will dispense what you need when you need it.

Your own Perpetual Pantry must reflect what is consumed in your home. Our family doesn’t eat canned soups; consequently there is no canned soup in my pantry. You may eat canned soups (and that’s fine!), so you need to include what you eat in your pantry. I know that is a big “duh,” but I’ve had so many e-mails from people asking me what they need in their pantries. That’s almost a trick question, and because I’m not clairvoyant, I’ve yet to answer it accurately and to the inquiring individual’s liking. Is it any wonder? I do have a basic pantry list (and I’ve included it here), but you will need to customize it to fit your family’s parameters. That’s how you get your own pantry going.

Besides grouping like with like (as mentioned above with regard to canned goods), you’ll also want to keep the shelves divided into categories of food. Put the cereals and grains (rice, pasta, oatmeal, dried beans, etc.) together on one shelf or in one area. Place baking stuff together on another shelf. The object is to organize it so it makes sense to you. Think grocery-store layout on a small scale. The same goes for the freezer: put all the meats together, juices together in the door, veggies, ice cream, etc., and next thing you know, you’ll be able to find stuff!

That doesn’t mean you have to be a perfectionist and start lining stuff up in alphabetical order! Being the proud owner of a Perpetual Pantry doesn’t need to be a full-time job. It does mean that you’ll spend a little time in your cupboard and in your freezer, but this can be done while you’re on the phone with a friend or are helping a child, who’s sitting at the kitchen table, with homework—just a little at a time when you have a spare moment. You want to be able to smile every time you open your pantry doors because it’s neat and organized, and you know that what you have in there works for your family. Your Perpetual Pantry is the key to kitchen organization and food prep.

You’ve seen the bumper sticker, “He who dies with the most toys wins.” Well, for a pantry, this is a bad idea. This is not the goal at all; the goal is to get the food you need in there so it will serve you and your family. Your well-stocked pantry doesn’t mean crammed to the gills so that you need to post a sign that says “Beware of falling objects.”

I have included below a basic list of things you’re going to want in your pantry, especially if you’ll be cooking some of the recipes in this book and in my other Saving Dinner books. The second part of this pantry equation is to keep the food easy to find (as mentioned above) and also to rotate your foods so your older stuff gets used first.

Remember: your pantry doesn’t have to be the equivalent of a scavenger hunt—it needs to be a place where you can get what you need to make what you want.

• Canned items and jarred items. All manner of tomato products: diced tomatoes, whole tomatoes, spaghetti sauces, pizza sauce, tomato paste, salsas. I keep a variety of sizes available, too. Canned beans: black beans, pinto beans, kidney beans, garbanzo beans, whatever bean you can find that you’ll eat. It’s less expensive to use dried beans, but canned are still cheap and will work in a pinch. I’m also fond of already canned baked beans and bean dips. You can doctor them with a little bacon and some brown sugar, and they taste like homemade. Canned seafood: tuna, salmon, crab, clams. Canned fruit and vegetables: stock the ones you like and will use. I have pineapple, applesauce, mandarin oranges, pears, peaches, whole cranberries, cranberry sauce, pumpkin, corn, olives, roasted red peppers, jars of tapenade, mushrooms, artichoke hearts, pesto (tomato and basil), canned chiles, tomatillos, anchovies, capers. Canned soups and broths: stock the ones you use. I use a lot of chicken broth (low-sodium has more flavor), beef broth, vegetable broth, and bottled clam juice; enchilada sauces (green and red), jars of gravy (great for extending what you made). Canned milk: sweetened condensed and evaporated—both work great in baking.

Excerpted from Saving Dinner Basics: How to Cook Even If You Don't Know How by Leanne Ely
All rights reserved by the original copyright owners. Excerpts are provided for display purposes only and may not be reproduced, reprinted or distributed without the written permission of the publisher.

Rewards Program