did-you-know? rent-now

Amazon no longer offers textbook rentals. We do!

did-you-know? rent-now

Amazon no longer offers textbook rentals. We do!

We're the #1 textbook rental company. Let us show you why.

9781580110860

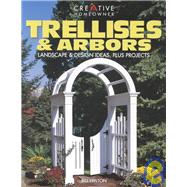
Trellises and Arbors : Landscape and Design Ideas, Plus Projects

by
  • ISBN13:

    9781580110860

  • ISBN10:

    158011086X

  • Format: Paperback
  • Copyright: 2002-12-01
  • Publisher: Creative Homeowner Pr

Note: Supplemental materials are not guaranteed with Rental or Used book purchases.

Purchase Benefits

  • Free Shipping Icon Free Shipping On Orders Over $35!
    Your order must be $35 or more to qualify for free economy shipping. Bulk sales, PO's, Marketplace items, eBooks and apparel do not qualify for this offer.
  • eCampus.com Logo Get Rewarded for Ordering Your Textbooks! Enroll Now
List Price: $16.95 Save up to $4.24
  • Buy Used
    $12.71

    USUALLY SHIPS IN 2-4 BUSINESS DAYS

Supplemental Materials

What is included with this book?

Summary

Ideal for privacy as well as decoration, a trellis or arbor provides a framework for growing, displaying, and enjoying ornamental flowering vines and climbing plants. Trellises & Arbors: Plans & Step-by-Step Projects is a photo-packed display of easy-to-build structures that are perfect for today's handy homeowners looking for a great architectural yard or garden detail. Fifteen projects are featured. Four-color photos, detailed illustrations and plans, and clearly written instructions guide the reader through every step involved in building each project. From simple projects-Fan Trellis, Trellis Wall, Tower Trellis-to more complex structures-Gateway Arbor, Trellis Bench, Pergola-there's something for everyone, whether beginners or more-experienced woodworkers. Safety advice; information on tools, techniques, materials, and plants; an array of handsome how-to projects; and an extensive glossary of terms combine to make Trellises & Arbors a compact but information-filled book that will help homeowners bring style, beauty, and focus to their outdoor "rooms."

Author Biography

Bill Hylton is a well-known writer in the home-improvement field and is widely recognized for his expert advice on woodworking projects.

Table of Contents

DESIGN & PLANTING
Design Guide
6(24)
Trellises
8(2)
Arbors
10(2)
Used as Dividers
12(2)
Used as Entries
14(2)
Used as Focal Points
16(2)
Vertical Landscaping
18(2)
More Uses for Trellises & Arbors
20(6)
Ready-Made Trellises & Arbors
26(4)
Plants For Trellises & Arbors
30(18)
Selecting Plants
31(2)
Consider Style
Match Physical Properties
Accommodate Climbing Style
Planting Vines
33(1)
Annuals
Perennials
Winter Care
34(1)
Training & Pruning
35(1)
Training Techniques
Time Your Pruning
Shape the Planting
Vine Directory
36(6)
Climbing & Rambler Roses
42(2)
Choosing a Rose
Planting Your Rose
Pruning and Training
Care
Rose Directory
44(4)
Tools, Techniques & Materials
48(10)
Tools & Techniques
49(6)
Layout Tools
Site Tools
Hand Tools
Power
Saws
Routers and Bits
Using a Router Safely
Sandpaper and Sanders
Clamps
Drill-Driver and Bits
Materials
55(3)
Wood
Lumber Species
Adhesives
Wood Finishes
PROJECTS
Fan Trellis
58(6)
Step-by-Step
60(4)
Cut the Trellis Parts
Bolt the Strips Together
Clamp the Strips to the Workbench
Attach Ribs to the Center Strip
Fasten Strips to the Top Rib
Trim the Ribs
Install the Trellis
Simple Trellises
64(8)
Step-by-Step
66(1)
Contemporary Trellis
66(3)
Prepare for Assembly
Add the Remaining Horizontal Strips
Attach the Remaining Verticals
Cut Dadoes Into the Headers
Attach the Headers
Diamond Trellis
69(2)
Double-Diamond Trellis
71(1)
Designer Trellis
72(6)
Step-by-Step
74(4)
Make the Top and Bottom Templates
Shape the Frame Top and Bottom
Prepare Top Piece for Lattice
Make the Frame Sides
Assemble the Trellis Frame
Cut the Lattice Strips
Fit the Horizontal Strips
Fit the Vertical Strips
More Wall-Mounted Trellis Ideas (Photo Gallery)
78(4)
Trellis Wall
82(8)
Step-by-Step
84(6)
Rip Stock into Strips
Shape Ends of Strips
Attach the Bottom Horizontal Strip
Install Remaining Horizontal Strips
Attach the First Vertical Strip
Install Remaining Vertical Strips
Cut the ``Windows''
Make the Corner Brackets
Install the Brackets
Trellis Wall On Freestanding Posts
Tower Trellis
90(8)
Step-by-Step
92(6)
Rip the Frame and Lattice Stock
Crosscut the Framing Strips
Assemble the First Tapered Frame
Cut and Attach Horizontal Lattice
Assemble the Second Tapered Lattice
Join Frames to Form Tower
Cut and Attach Remaining Lattice Strips
Cut and Install the Vertical Lattice Strips
Install the Weavers
Make the Cap
Make the Tower Stand
Trellis Bench
98(8)
Step-by-Step
100(6)
Construct Post-and-Beam Assemblies
Cut the Seat Frame Parts
Assemble the Seat Frame
Attach the Seat Frame to Post-and-Beam Assemblies
Attach the Seat and Backrest Boards
Cut the Side Lattices
Assemble Side Lattices
Mount the Side Lattices
Mount the Trellis Roof
Modular Corner Trellis
106(8)
Step-by-Step
108(6)
Cut and Prepare the Frame Pieces
Cut Lattice Pieces
Cut Latticework Gauges
Assemble the Latticework
Mount Lattice into Frame
Cut the Posts
Cut the Brackets
Join Lattice Modules to the Post
Install Rails and Brackets
Trim the Post Tops
Install the Trellis Outdoors
More Stand-Alone Trellis & Arbor Ideas (Photo Gallery)
114(4)
Modular Arbor
118(8)
Step-by-Step
120(6)
Cut the Framed Lattice Panels
Assemble the Lattice
Put the Lattice in the Frames
Cut the Arbor Parts
Make the Bottom Rail Template
Make the Roof Beam Template
Make the Roof Crosspiece Template
Shape the Bottom Rails
Install Dowels in the Rails
Assemble the Sides
Shape the Beams
Join the Beams to the Sides
Shape and Install the Roof Crosspieces
Gateway Arbor
126(16)
Step-by-Step
128(14)
Cut the Arch Segments
Test-Fit Arch Blanks
Glue Up Arch Blanks
Clamp Arch Blanks
Lay Out the Arch Template
Cut the Template Arcs
Cut the Mortise Opening
Cut Out Arches
Make the Two Arches
Make the Rungs
Assemble the Arches
Cut Joinery in Post Boards
Assemble the Posts
Make the Box Beams
Assemble the Posts and Beams
Make the Rails and Posts
Assemble and Mount the Rails and Pales
Make and Apply the Moldings Lay Out and Dig the Postholes
Set Up the Side Assemblies
Make the Mortising Template
Mortise the Arches
Make the Loose Tenons
Mortise the Side Assemblies
Cut the Gate Parts
Shape the Top Rail
Make the Tenoning Template
Groove the Rails
Rout Tenons on Stiles and Slats
Glue Up the Gate
Make the Jambs
Hang the Gate
Install the Baseboards
Grape Arbor
142(8)
Step-by-Step
144(6)
Locate the Corner Posts
Establish Posthole Centers
Dig the Postholes
Set and Brace the Corner Posts
Set the Intermediate Posts
Anchor Posts in Concrete
Trim Post Tops
Cut and Install the Rafters
Install Roof Cross Strips
Install Roof Long Strips
Install Side Horizontal Strips
Install Side Vertical Strips
More Large Arbor Ideas (Photo Gallery)
150(4)
Resource Guide 154(2)
Glossary 156(1)
Credits 157(1)
Index 158

Supplemental Materials

What is included with this book?

The New copy of this book will include any supplemental materials advertised. Please check the title of the book to determine if it should include any access cards, study guides, lab manuals, CDs, etc.

The Used, Rental and eBook copies of this book are not guaranteed to include any supplemental materials. Typically, only the book itself is included. This is true even if the title states it includes any access cards, study guides, lab manuals, CDs, etc.

Rewards Program